Back to Guide
Polygon tutorial
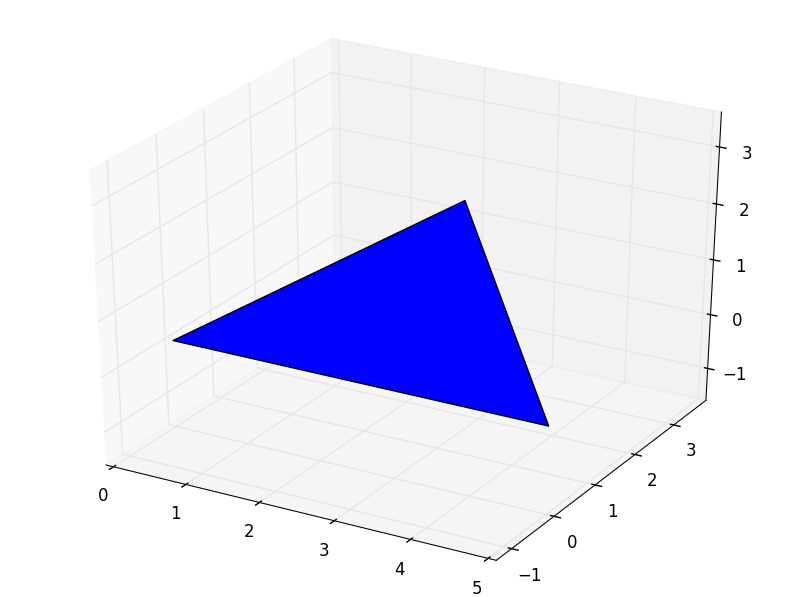
Example of a triangle given by three points: [[0, 0, 0], [5, 0, 0], [2.5, 2.5, 2]]
-
class
pyny3d.geoms.Polygon(points, make_ccw=True, **kwargs)[source] The most basic geometry class. It generates and stores all the information relative to a 3D polygon.
Instances of this class work as iterable object. When indexed, returns the points which conform it.
Parameters: - points (ndarray shape=(N, 2 or 3)) – Sorted points which form the polygon (xyz or xy). Do not repeat the first point at the end.
- check_convexity (bool) – If True, an error will be raised for concave Polygons. It is a requirement of the code that the polygons have to be convex.
Returns: None
Note
This object can be locked (
.lock()method) in order to precompute information for faster further computations.
First of all, if performance is important in your use of pyny3d you should control the ccw verification. It is active by default but it can be switched off if you are sure that the Polygons you are going to introduce are well ccw ordered. The time expended in the verification can be very high:
In [1]: import numpy as np
     ...: import pyny3d.geoms as pyny
     ...: polygon = np.array([[0,0,0], [7,0,0], [7,10,2], [0,10,2]])

In [2]: %timeit pyny.Polygon(polygon)
100 loops, best of 3: 2.27 ms per loop

In [3]: pyny.Polygon.verify = False

In [4]: %timeit pyny.Polygon(polygon)
1000000 loops, best of 3: 1.8 µs per loop
The rest of classes are affected exactly the same:
In [5]: pyny.Polygon.verify = True

In [6]: surface_poly = [np.array([[0,0,0], [7,0,0], [7,10,2], [0,10,2]]),
   ...:                 np.array([[0,10,2], [7,10,2], [3,15,3.5]]),
   ...:                 np.array([[0,10,2], [3,15,3.5], [0,15,3.5]]),
   ...:                 np.array([[7,10,2], [15,10,2], [15,15,3.5], [3,15,3.5]])]
   ...:

In [7]: %timeit pyny.Place(surface_poly)
100 loops, best of 3: 9.89 ms per loop

In [8]: pyny.Polygon.verify = False

In [9]: %timeit pyny.Place(surface_poly)
100000 loops, best of 3: 11.7 µs per loop
The time spent is so high because the verification it is not actually a verification; instead, pyny3d creates a convex Polygon with the inputed points. By doing this, we can always be sure about the library treatment of without be concerned about errors once the Polygon is introduced.
I know that “verification” is so slow, but instead of write an “incredibly fast verification” it is far better to have the possibility to switch it off. Undoubtedly, the fastest verification is always the one that never occurs. In fact, all the internal processes in pyny3d (specially the shading ones) works with the verification disabled.
Non-trivial methods
This class, for being the lowest level one (and the simplest), does not actually require great explanations. Instead, non-trivial functions will be commented. Trivial methods are considered those which are easy enough to be understood with the documentation given in Polygon. On the other hand, the non-trivial methods can cause problems if they are not properly understood in action.
Trivial methods:
method description .get_path() Returns the matplotlib.path.Path of the z=0 projection .get_shapely() Returns the shapely.Polygon of the z=0 projection .get_area() Returns the real area .get_height() Returns the z value for the parametric equation for a list of points .is_convex() Returns whether a polygon is convex .make_ccw() Changes the order of a set of points to be ccw .lock() Precomputes some values to speedup shading
The methods to transform the classes are explained in detail separately in Transformations.
The .pip() method is discussed separately in
PiP and Classify tutorial.
get_parametric
Computes the parametric equation of the plane that contains the polygon. The output has the form np.array([a, b, c, d]) for:
What makes non-trivial this method is that it can verify whether the Polygon
is contained in a plane or not. If check argument is True, and it is
by default, the program will raise an error if all the points are not in the
same plane.
In [10]: polygon = pyny.Polygon(np.array([[0,0,0], [7,0,0], [7,10,2], [0,10,2]]))
    ...: polygon.get_parametric(True, tolerance=0.01)
Out[10]: array([0, 14, -70, 0])

In [11]: non_polygon = pyny.Polygon(np.array([[0,0,-99], [7,0,0], [7,10,2], [0,10,2]]))
    ...: non_polygon.get_parametric(True, tolerance=0.01)
ValueError: Polygon not plane:
[[0  0 -99]
 [7  0  0]
 [7 10  2]
 [0 10  2]]
Warning
This verification is not executed automatically. If it is required, the only way to do it is by requesting the parametric equation.
to_2d
Generates the real 2D polygon of the 3D polygon.
In general, pyny3d mostly uses the z=0 projection to perform
operations with the polygons. For this reason, if real 2D
planar operations are required (draw a real sized matplotlib.path,
calculate real area...) the best way is to create a new
pyny.Polygon with this method.
What it actually does is to calculate the 3D rotation matrix that performs a turn which put the Polygon in the z=0 plane.
In [12]: import matplotlib.pyplot as plt
...: polygon = pyny.Polygon(np.array([[0,0,0], [5,0,0], [2.5,2.5,99]]))
...: polygon.plot2d()
...:
...: polygon.to_2d().plot2d()
...: plt.axis('equal')
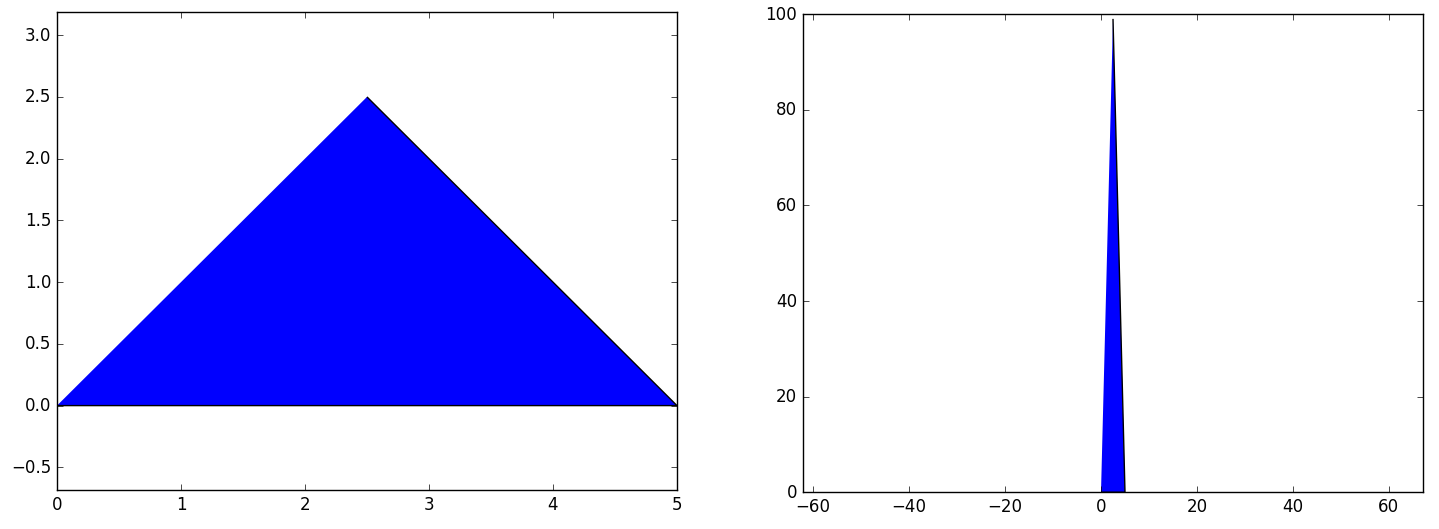
Zenital view of the tilted triangle and the real triangle in z=0
contains
This method applies the Point in Polygon algorithm for an arbitrary number of
points and one polygon (without its z position). It depends completely on
matplotlib.path.Path.contains_points. The only added modification is that
original radius float argument has been replaced with edge boolean
argument.
The method was created primarily for cleanliness. Compare this two identical commands:
In [13]: points = np.array([[0, 0], [2, -0.1], [2, 2], [5, 5], [5.1, 0]])

In [14]: polygon.get_path().contains_points(points, radius=0.001)
Out[14]: array([True, False, True, False, False], dtype=bool)

In [15]: polygon.contains(points, True)
Out[15]: array([True, False, True, False, False], dtype=bool)
Next tutorial: Surface tutorial