Back to Guide
Place tutorial

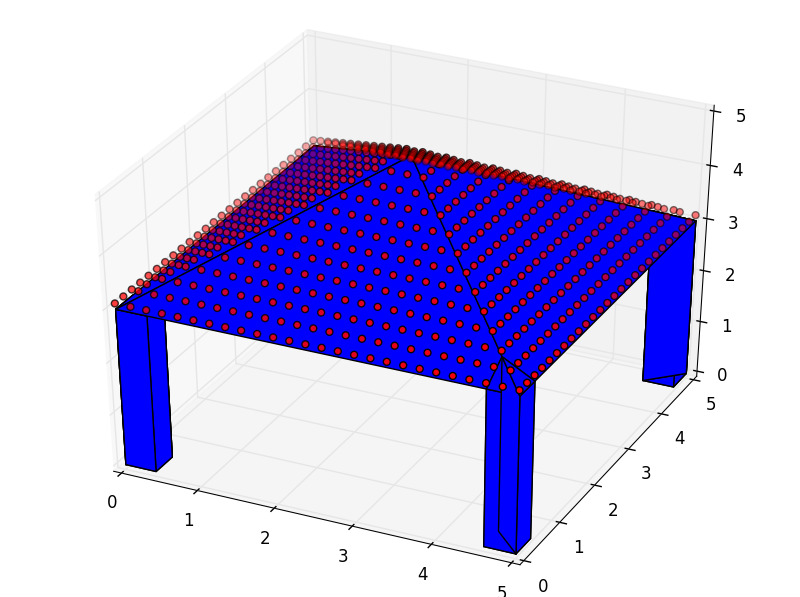
Example of a Place with the three objects it can manage: a Surface, a unlimited number of Polyhedra and a Set of points.
-
class
pyny3d.geoms.Place(surface, polyhedra=[], set_of_points=array([], shape=(0, 3), dtype=float64), make_ccw=True, melt=False, **kwargs)[source] Aggregates one
pyny.Surface, one Set of points and an indefinite number ofpyny.Polyhedra.Represents the union of a surface with an unlimited number of obstacles. All the elements that conform a Place keep their integrity and functionality, what the Place class makes is to give the possibility to perform higher level operations in these groups of objects.
Instances of this class cannot work as iterable object and cannot be indexed.
- The lower level instances will be stored in:
- Place.surface
- Place.polyhedra
- Place.set_of_points
Parameters: - surface (
pyny.Surface, list ofpyny.Polygonor list of ndarray) – This is the only necessary input to create apyny.Place. - polyhedra (list of
pyny.Polyhedra) –pyny.Polyhedrato attach to thepyny.Place. - set_of_points (ndarray (shape=(N, 3))) – Points to attach to the
pyny.Place. - make_ccw (bool) – If True, points will be sorted ccw for each polygon.
Returns: None
Note
This object is implemented to be used dynamically. Once created, it is possible to add elements, with
.add_set_of_points,.add_extruded_obstaclesamong others, without replace it.
Non-trivial methods
As always, you can also use the Place documentation for method-by-method description, specially for the trivial methods we are going to skip in this section.
Trivial methods:
method description .add_set_of_points() Add a set of points .clear_set_of_points() Remove the points in this place .get_height() Returns the z value for a list of points .add_holes() Add holes to the surface
The methods to transform the classes are explained in detail separately in Transformations.
add_extruded_obtacles
Probably the easiest way to introduce a Polyhedron in pyny3d is through
.add_extruded_obtacles() method. It uses the
Polyhedron.by_two_polygons() algorithm we saw in the
last tutorial Polyhedron tutorial but only needs one polygon: the “top”
one. The other required Polygon is automatically computed as the intersection
of a prism which projects along z axis and its section is the polygon inputed,
and the Place’s Surface.
Seen otherwise, given a top polygon of an obstacle, the Polyhedron will be generated by extruding its top to the ground (Surface):
import numpy as np
import pyny3d.geoms as pyny

# Geometries
surf_poly = np.array([[0,0,0], [10,0,0], [10,10,6], [0,10,6]])
obs_top = np.array([[3,3,10], [6,4,8], [5,7,11]])

# Objects
place = pyny.Place(surf_poly)
place.add_extruded_obstacles(obs_top)
place.iplot()  # transparent is the default color

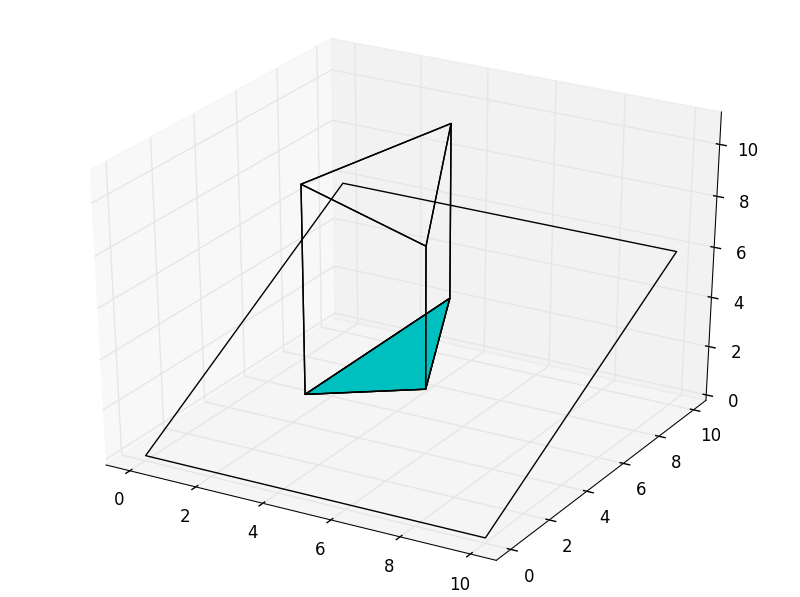
Extruded polygon in z axis. ``obs_poly`` is the upper one and the auto-computed is which is in cyan color.
Note
This method also works if the top_polygon is actually the “bottom_polygon”. In this case where the polygon to extrude is below the Surface, the obtained Polyhedron will be computed from the bottom upwards.
mesh
Generates a xy list of points distributed in a mesh with a given mesh_size in the Place.surface’s domain and computes the Surface’s height for the nodes to have a xyz list of points. This mesh is alligned with the main directions x and y. By default, the points will be attached to the Place, that is, they will be added to the current Place’s set of points. This mesh will avoid the possible holes in the Surface and has the possibility of place points on the edges or not.
What makes this method so important is its usage in the shading simulations because it is the easiest way to cover the whole Place (or Space) with sensible points which will be the real “shading sensors”.
In [1]: place.mesh(0.4, edge=True)
   ...: place.iplot()
   ...:

In [2]: place.clear_set_of_points()
   ...: place.mesh(0.4, edge=False)
   ...: place.iplot()
   ...:
Next tutorial: Space tutorial
