Virtual Machines
Table of Contents
Introduction
This guide goes through the download and import of Trusted Analytics Platform beta on a virtual machine (VM). Currently Trusted Analytics Platform VM only supports Virtual Box. These instructions do not cover the installation of Virtual Box. Virtual Box supports many platforms and can be downloaded for free. The installation documentation is also available online.
Requirements
- 12GB of memory needs to be allocated to the VM
- 45GB of free hard drive space
- Working Virtual Box 4.3 installation
Download VM Image
Open a Linux shell (or for Windows user a command prompt) to run the various commands.
The VM image is downloaded from AWS. The download requires the AWS Command Line Interface (CLI) client. Instructions for downloading and installing CLI can be found at Amazon cli documentation.
After installing the interface, verify the installation by running:
$ aws --version
The result should be similar to this:
aws-cli/1.2.9 Python/2.7.6 Linux/3.8.0-35-generic
Take note of the aws-cli version, as it must be greater or equal to 1.2.9. Older versions of the aws-cli client does not work with the restricted permissions.
The aws-cli client can be updated with pip or download the new Windows MSI (reference Windows GUI Client).
$ sudo pip install -U awscli
After aws installation, run:
$ aws configure
The program prompts for the access and secret tokens given at registration. When prompted for the “Default region name”, use “us-west-2”. When prompted for the “Default output format”, use “json”.
AWS Access Key ID [None]: <my access key>
AWS Secret Access Key [None]: <my secret key>
Default region name [None]: <us-west-2>
Default output format [None]: <json>
List the files in the directory:
$ aws s3 ls s3://trustedanalytics-repo/release/latest/vm/
2014-08-19 12:57:03           0
2014-11-25 16:22:57          70 TrustedAnalytics-VM.md5
2014-11-25 16:22:57 14656025025 TrustedAnalytics-VM.tar.gz
Download the tar.gz file. In this case, it’s ‘TrustedAnalytics-VM.tar.gz’:
$ aws s3 cp s3://trustedanalytics-repo/release/latest/vm/TrustedAnalytics-VM.tar.gz ./
Windows GUI Client
If you are on a Windows machine, and you prefer a GUI client, use the S3Browser to download the VM.
Download the Windows MSI http://s3browser.com/download.php.
Install and open the S3Browser application.
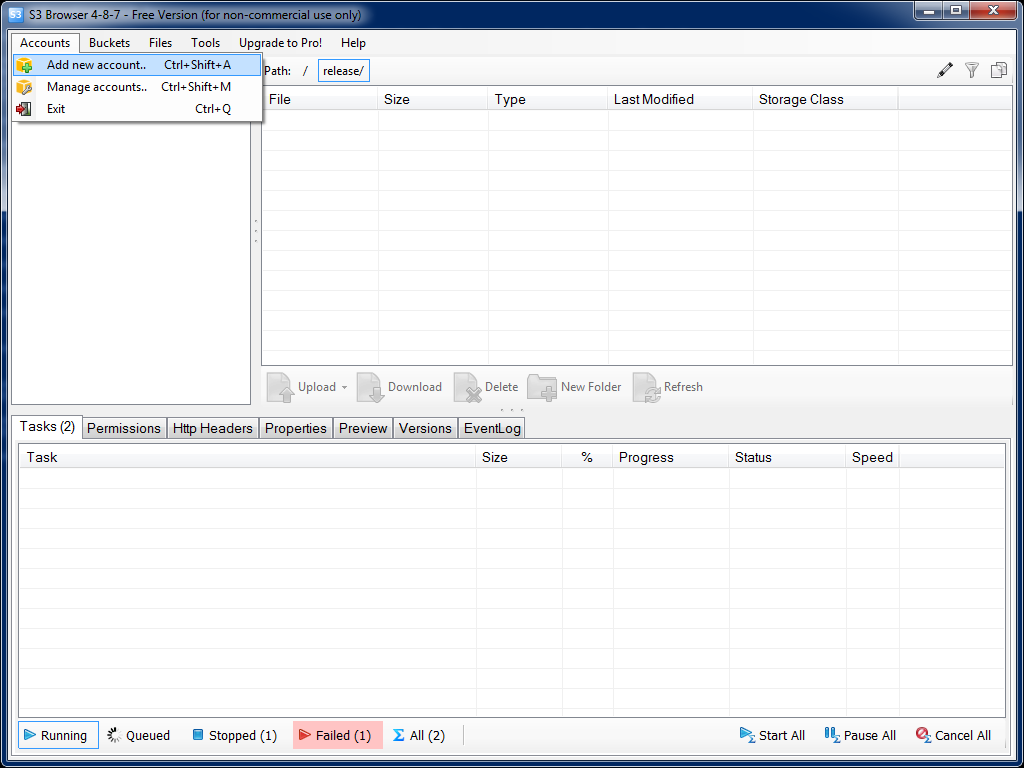
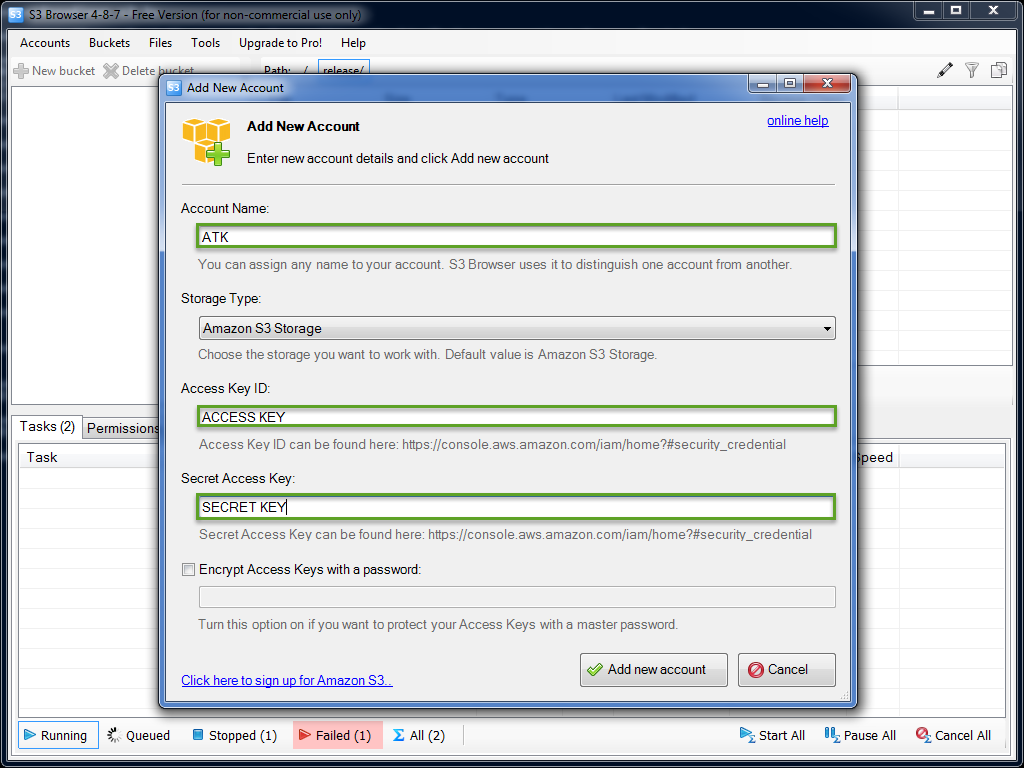
Add the keys provided.
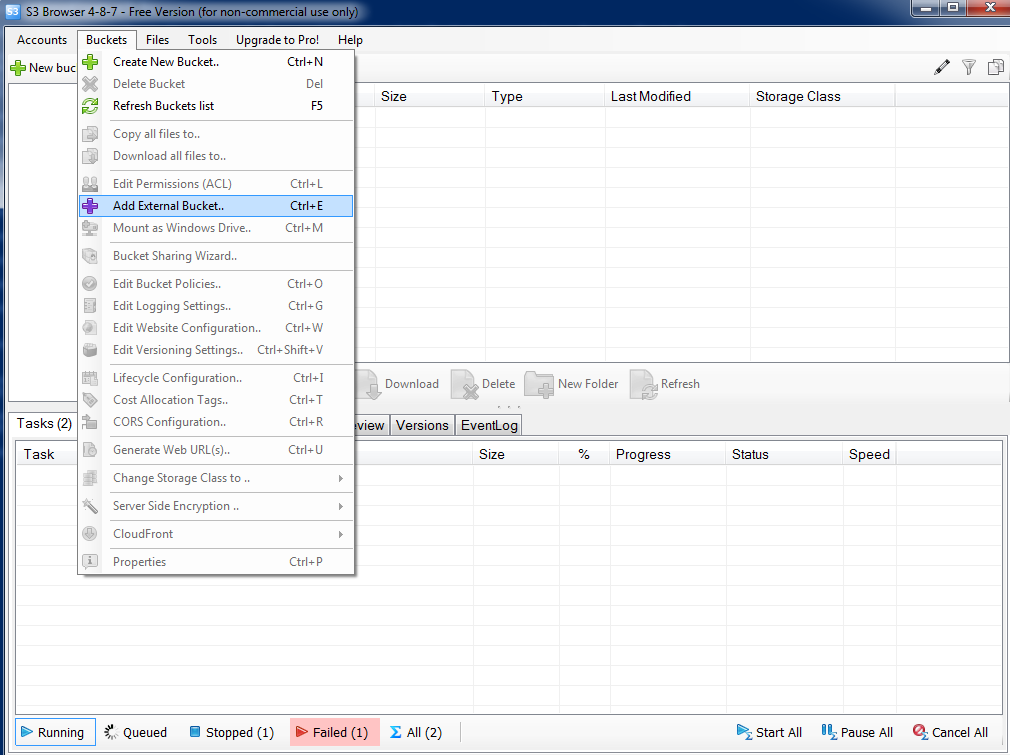
Navigate to:
- Buckets
- Add External Bucket
or press Ctrl + E.
See Fig. 15.3.
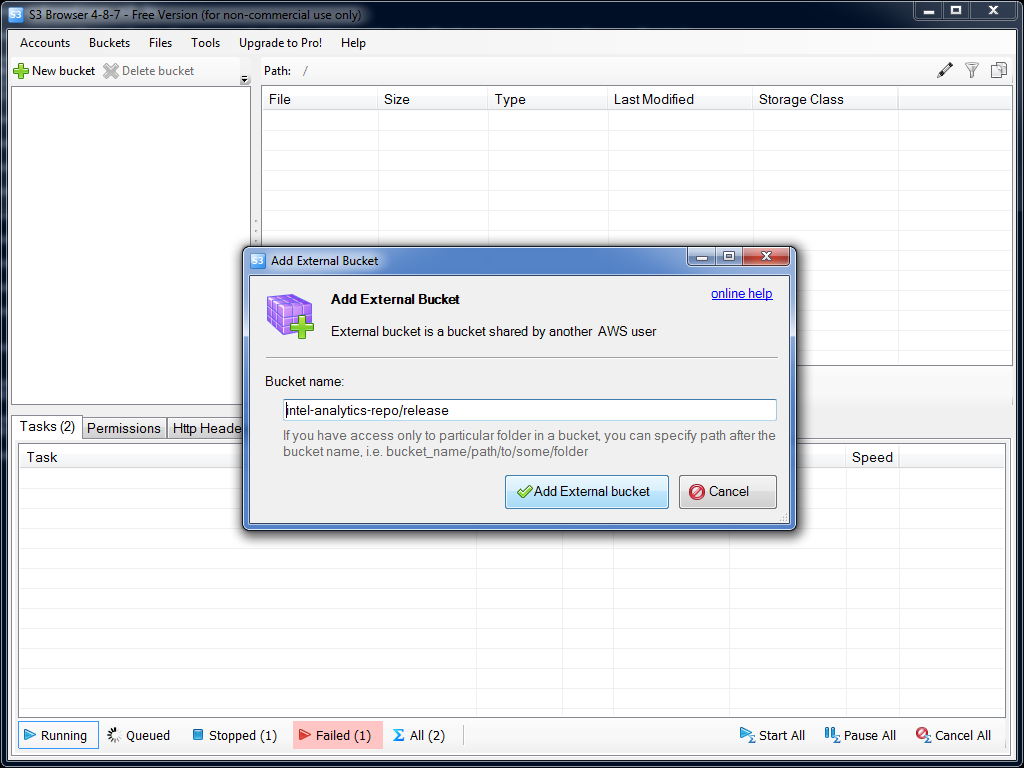
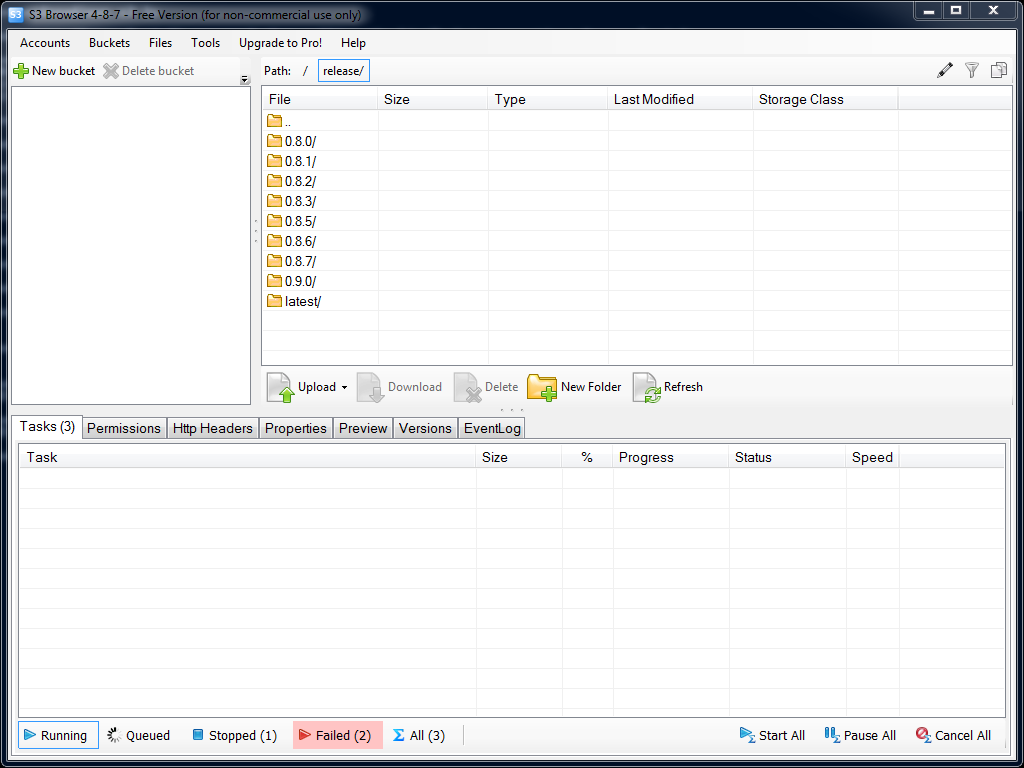
Add the bucket url “trustedanalytics-repo/release”, then click Add External bucket. See Fig. 15.4.
After adding the bucket, a list of folders shows up on the right. See Fig. 15.5.
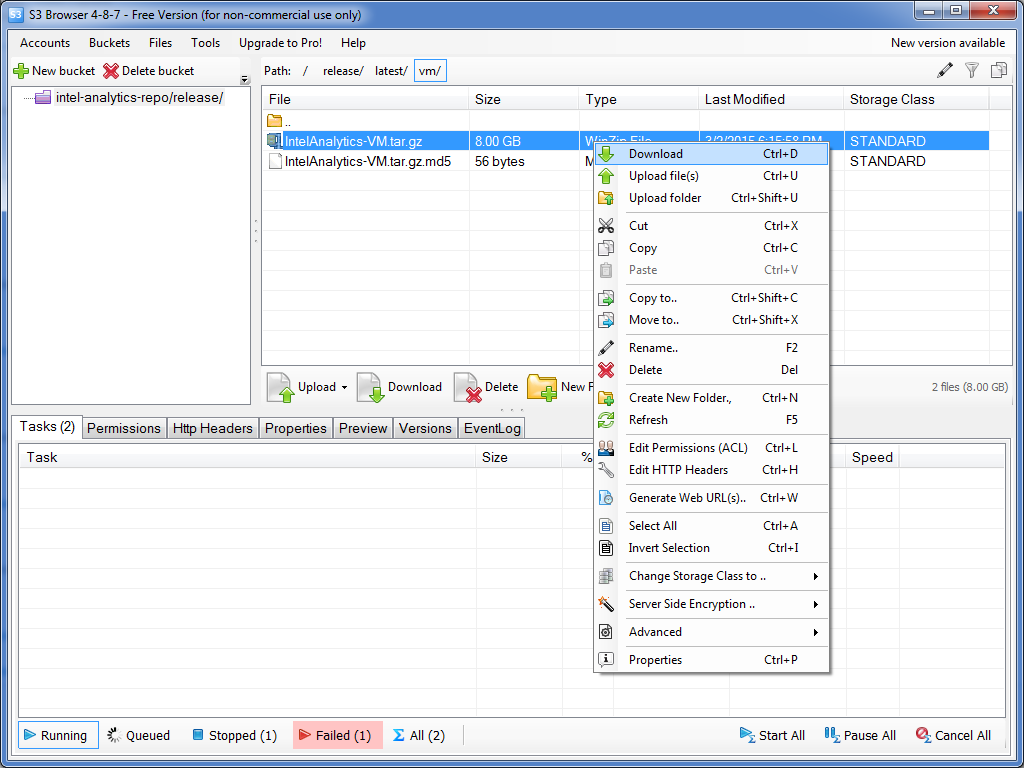
Select the appropriate version, and navigate to the VM folder, then right click and download the “tar.gz” file. See Fig. 15.6.
Extract Archive
Extracting On Windows
Extracting on Windows is relatively easy. Use 7zip (or equivalent tool) to extract the archive.
Extracting On Linux
After acquiring the VM, extract the archive:
$ tar -xvf TrustedAnalytics-VM.tar.gz
After extraction, there should be two (2) files, one with the extension ‘vmdk’, and another with the extension ‘ovf’.
Import Image
To import the VM image, do the following steps in Virtual Box.
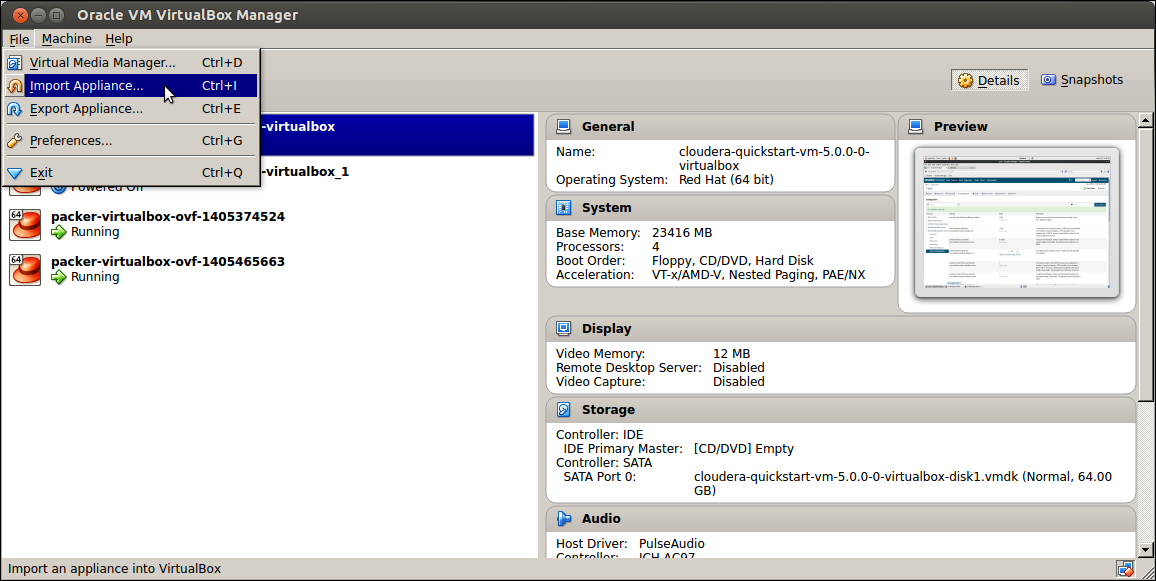
Go to the File menu, then Import Appliance. See Fig. 15.7.
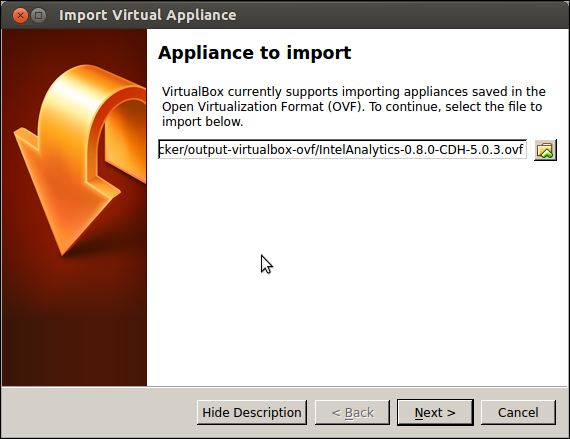
Select the file with the extension ‘ovf’, which was extracted earlier from the VM image. See Fig. 15.8.
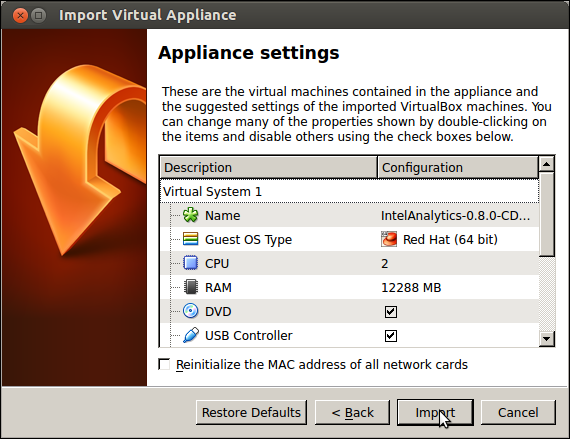
Import the Trusted Analytics Platform VM. See Fig. 15.9.
After clicking Import, wait for the VM to be imported. See Fig. 15.10.
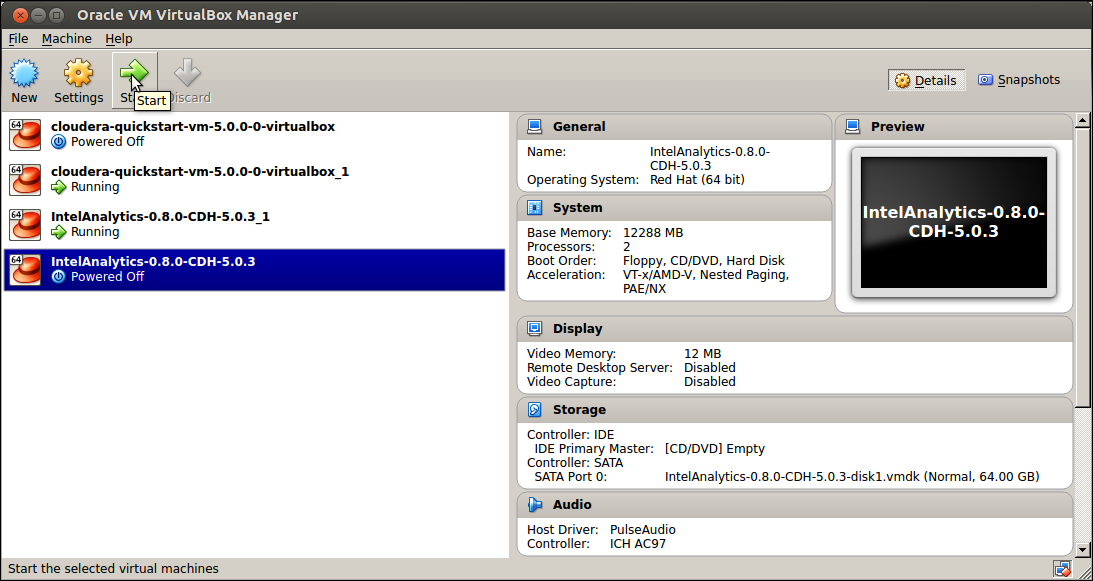
Once the VM is imported, boot the VM by selecting the VM and clicking Start. See Fig. 15.11.
Running Trusted Analytics Platform VM Image
Before starting
After every reboot of the VM, the Trusted Analytics Platform server must also be restarted.
$ sudo service trustedanalytics restart
Upon restart, if the service wasn’t running before it was told to stop, the system reports:
initctl: Unknown instance:
This message can be safely ignored.
Sample Scripts
The VM is pre-configured and installed with Trusted Analytics Platform. Several examples and datasets are included to get people familiar with the coding and behavior of Trusted Analytics Platform.
The examples are located in ‘/home/cloudera/examples’.
drwxr-xr-x 2 cloudera cloudera 4096 Aug  1 00:53 datasets
-rw-r--r-- 1 cloudera cloudera 1100 Aug  1 10:15 lbp.py
-rw-r--r-- 1 cloudera cloudera  707 Aug  1 00:53 lda.py
-rw-r--r-- 1 cloudera cloudera  930 Aug  1 00:53 lp.py
The datasets are located in ‘/home/cloudera/examples/datasets’ and ‘hdfs://user/trustedanalytics/datasets/’.
-rw-r--r--   1 atkuser atkuser        122 2014-08-01 /user/trustedanalytics/datasets/README
-rw-r--r--   1 atkuser atkuser     617816 2014-08-01 /user/trustedanalytics/datasets/apl.csv
-rw-r--r--   1 atkuser atkuser    8162836 2014-08-01 /user/trustedanalytics/datasets/lbp_edge.csv
-rw-r--r--   1 atkuser atkuser     188470 2014-08-01 /user/trustedanalytics/datasets/lp_edge.csv
-rw-r--r--   1 atkuser atkuser  311641390 2014-08-01 /user/trustedanalytics/datasets/test_lda.csv
The datasets in ‘/home/cloudera/examples/datasets’ are for reference. The actual data that is being used by the Python examples and the Trusted Analytics Platform server is in ‘hdfs://user/trustedanalytics/datasets’.
To run any of the Python example scripts, start in the examples directory and start Python with the script name:
$ python <SCRIPT_NAME>.py
where <SCRIPT_NAME> is any of the scripts in ‘/home/cloudera/example’.
Example:
$ cd /home/cloudera/examples
$ python pr.py
Eclipse/PyDev
The VM comes with Eclipse and PyDev installed and ready for use. Importing the example scripts is easy.
Go to the desktop, and double-click on the Eclipse icon.
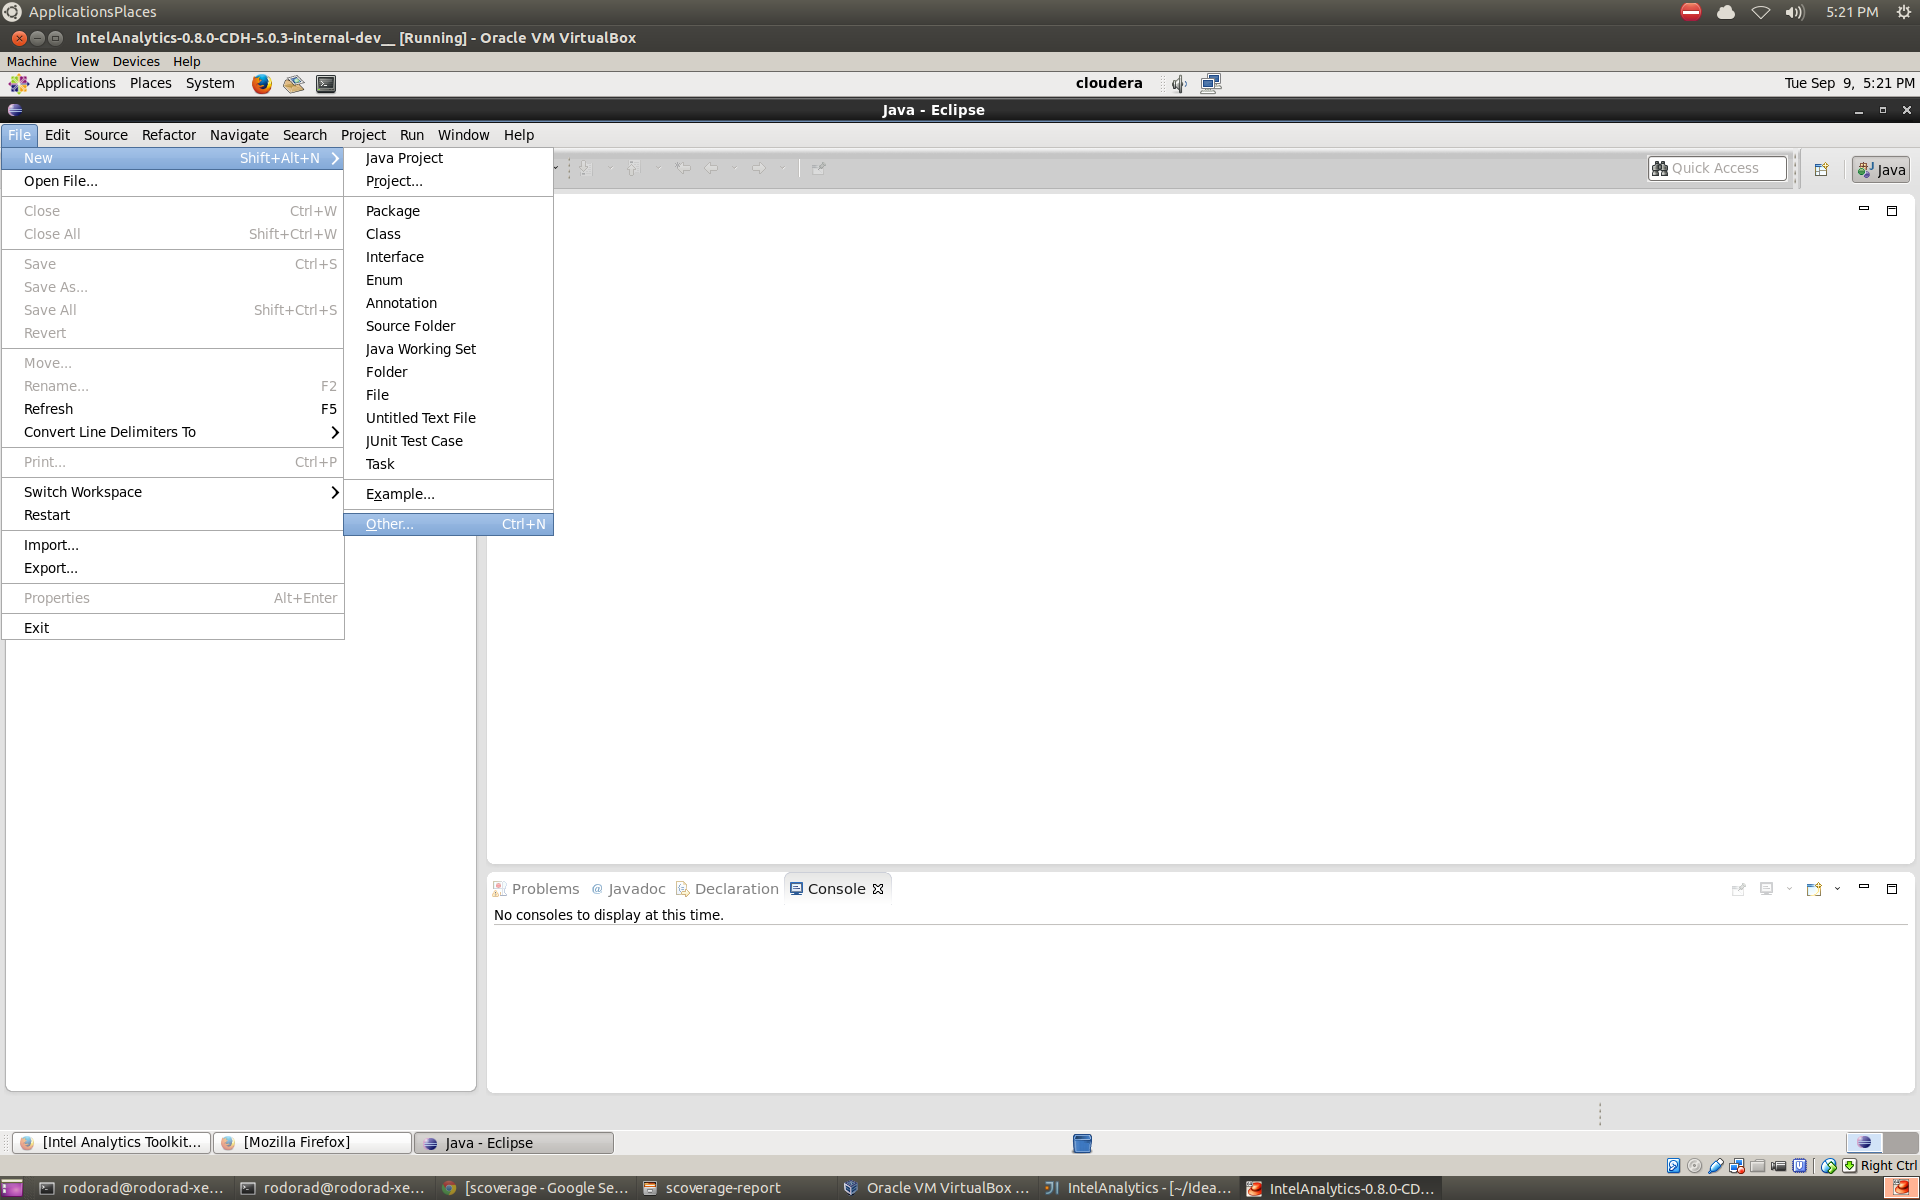
Go to File menu, and select New and then Other.
See Fig. 15.12.
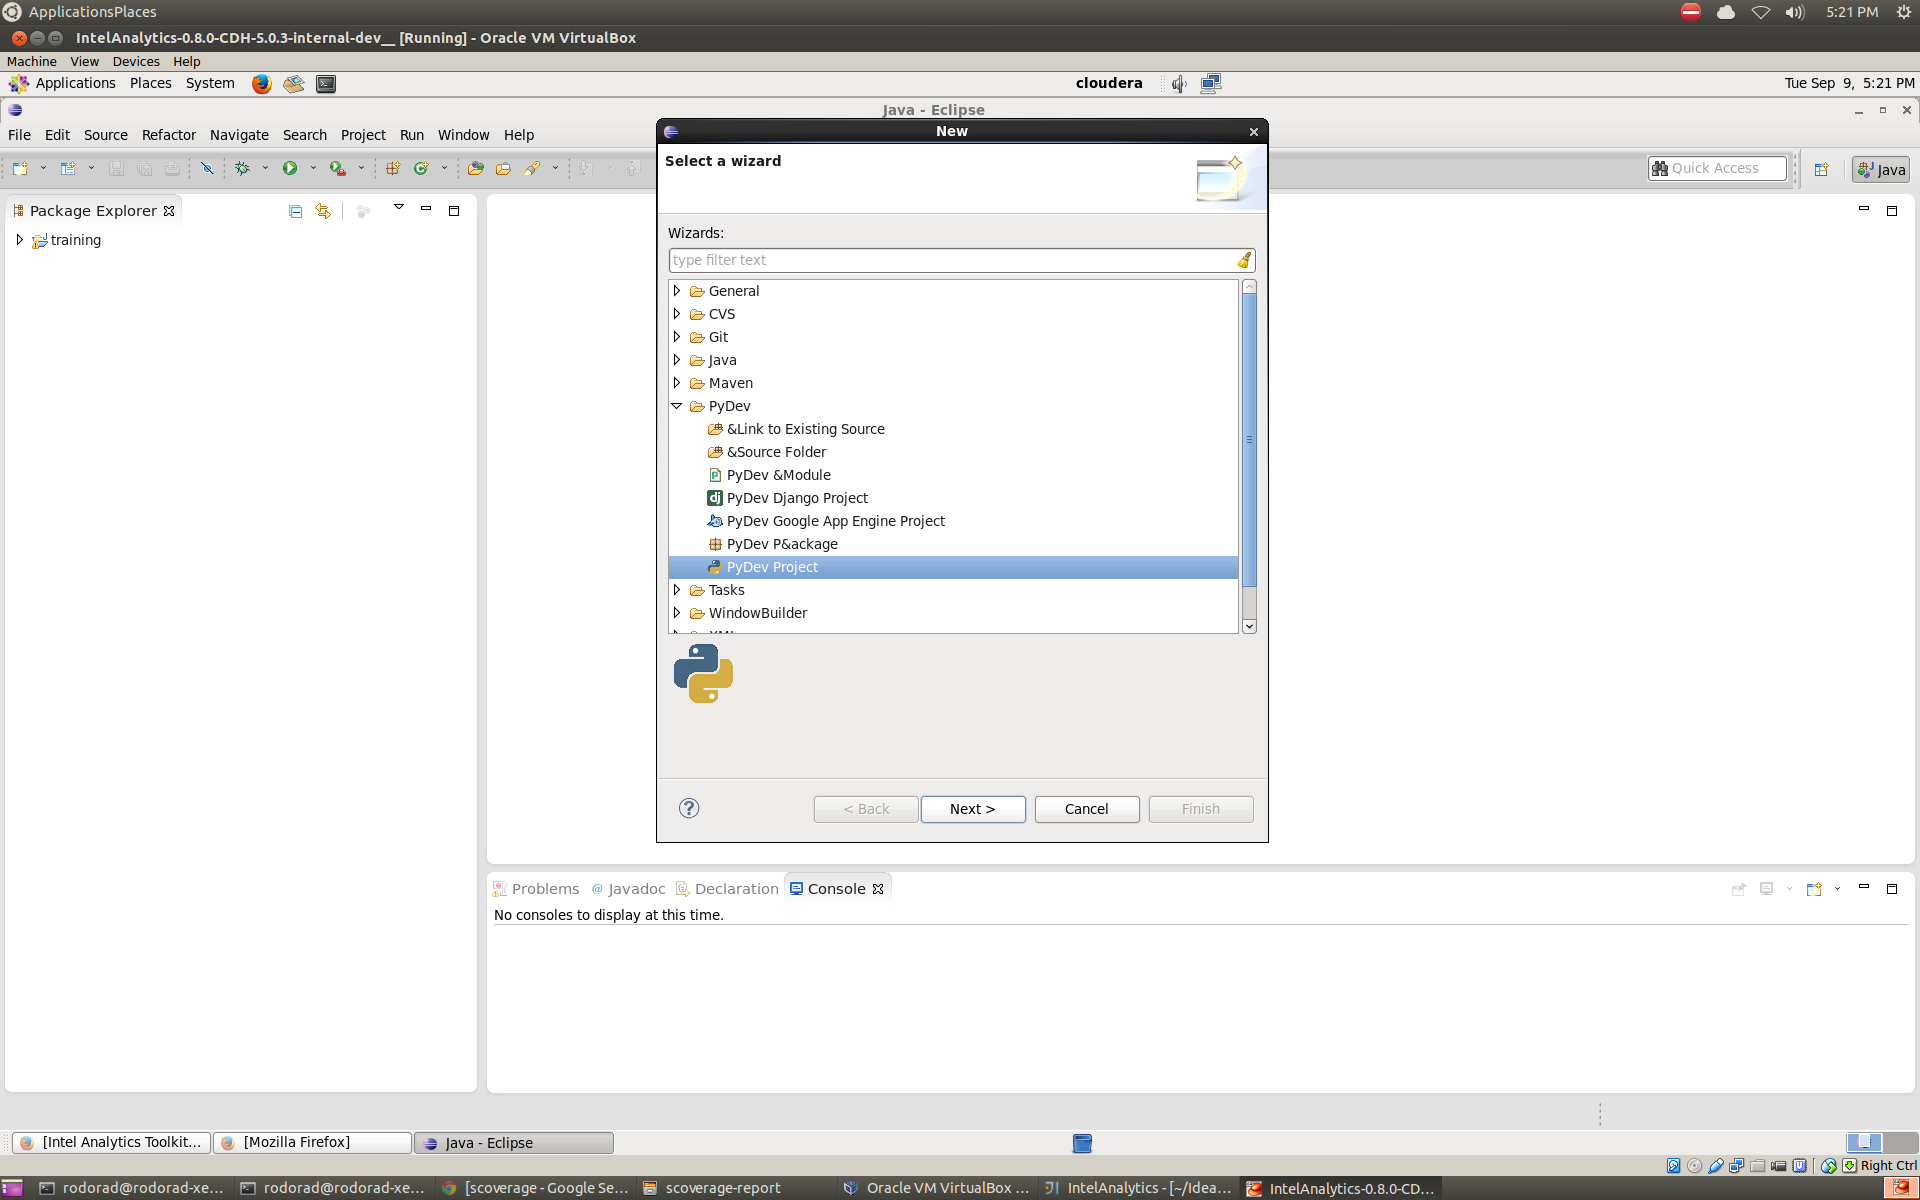
After selecting File->**New**->**Other**, look for the PyDev folder and expand the list, then select PyDev Project then click Next. See Fig. 15.13.
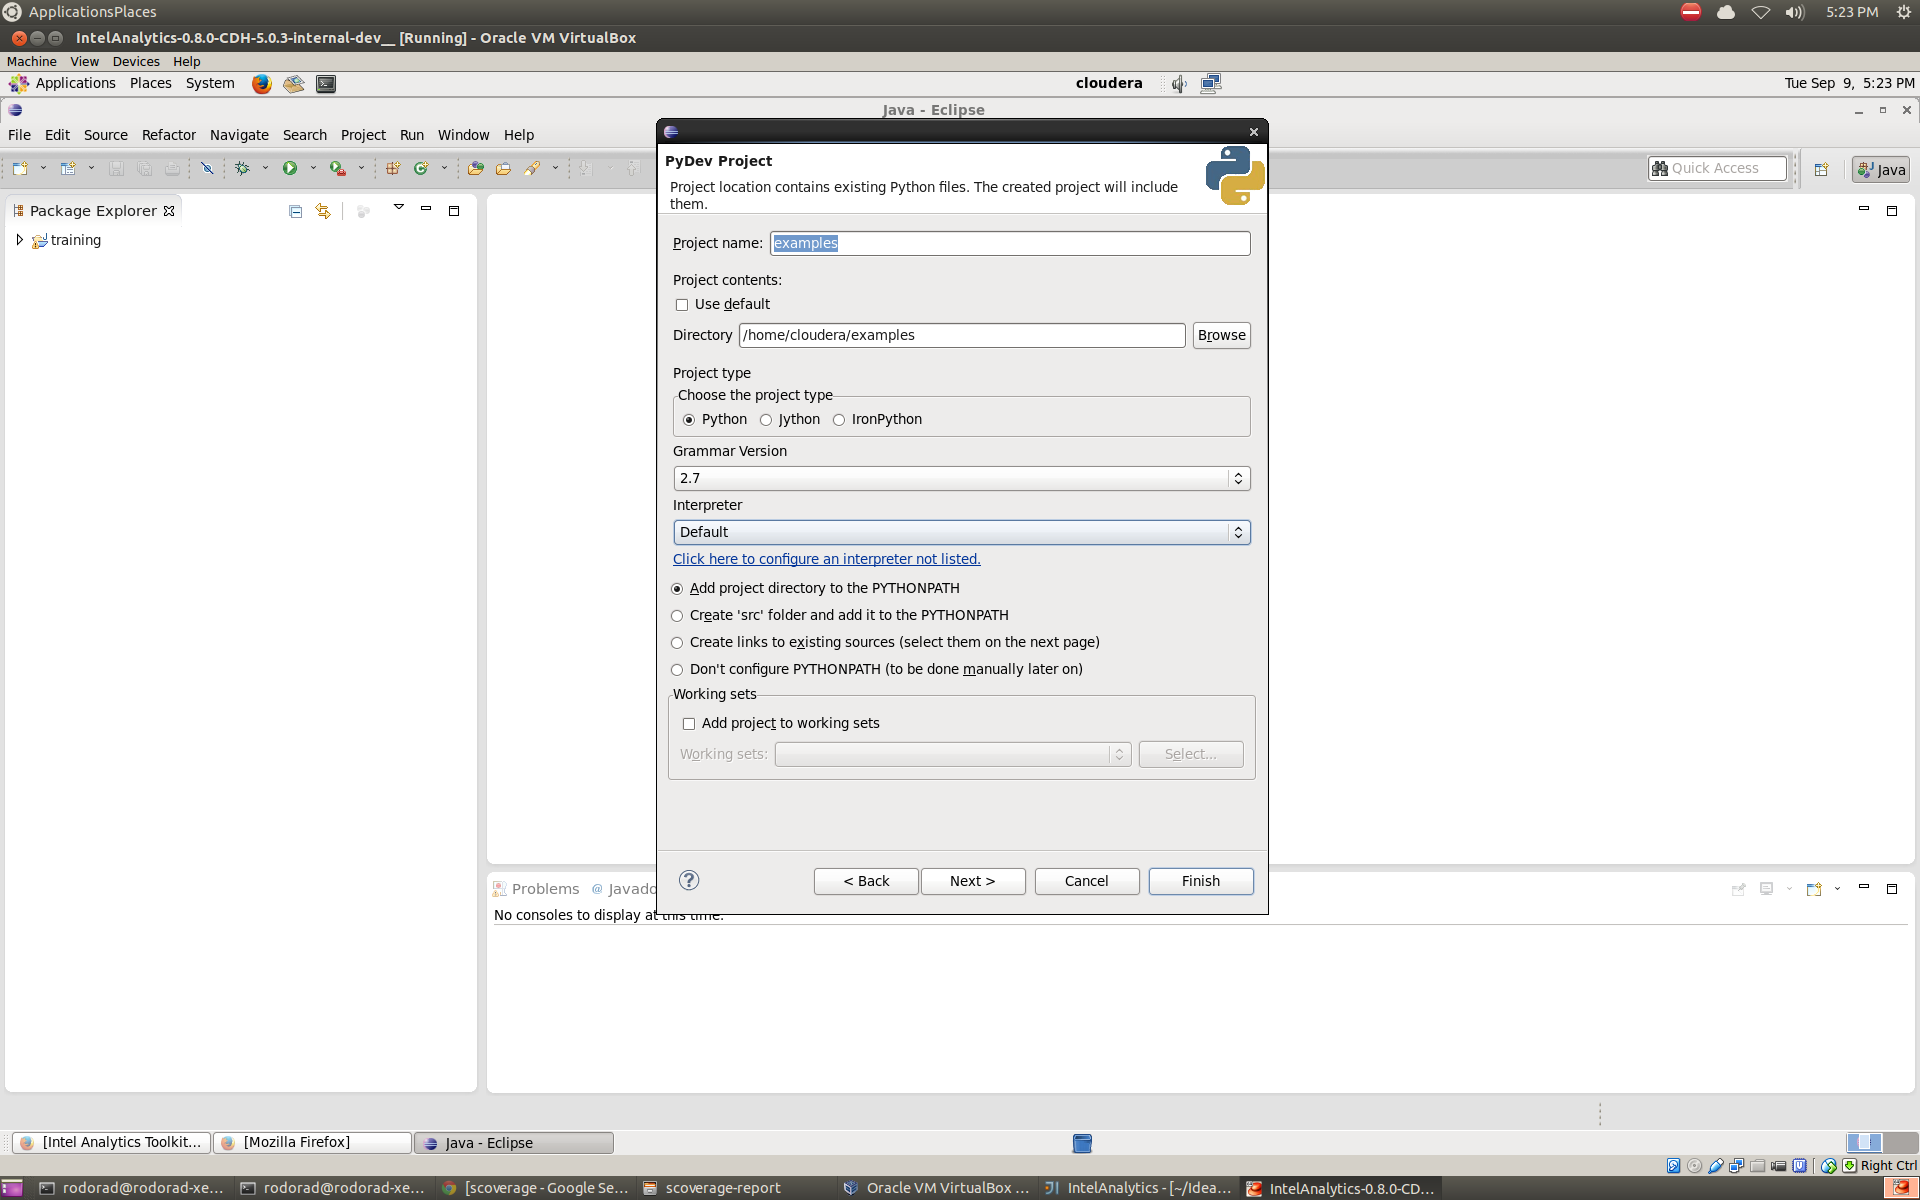
The only field you have to change is the ‘Project Contents’ default directory. Uncheck ‘Use default’ and enter the directory you want to use ‘/home/cloudera/examples’. Everything else can be left with the default values. Click Next when you are done. See Fig. 15.14.
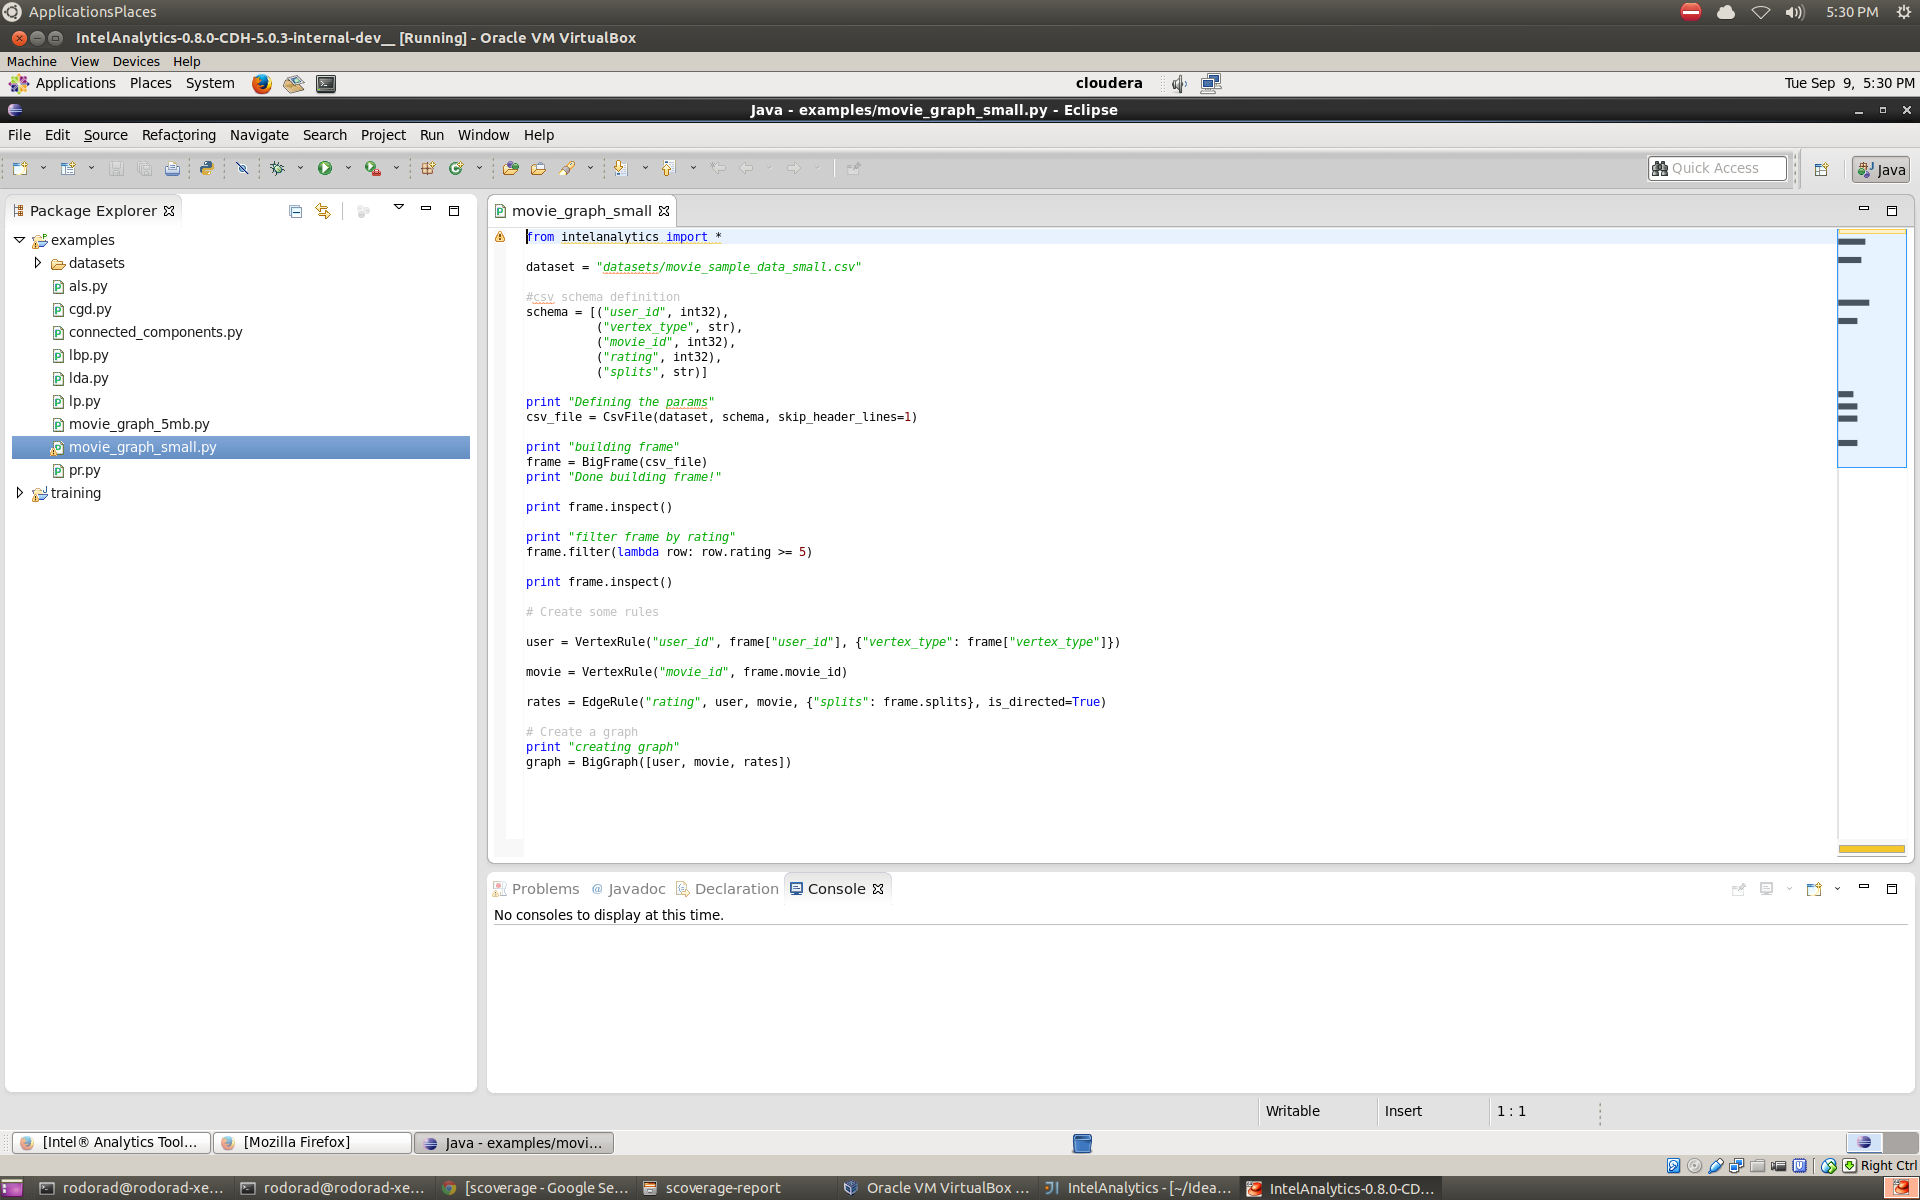
You should now be able to see all the example scripts on the left hand pane. See Fig. 15.15.
Logs
To debug changes to the scripts (or to peek behind the curtain), the log
file is ‘/var/log/trustedanalytics/rest-server/output.log’.
To show the log as it is generated, run tail -f:
$ sudo tail -f /var/log/trustedanalytics/rest-server/output.log
Updating
Upon receipt of access and secret tokens, edit ‘/etc/yum.repos.d/ta.repo’ and
replace myKey and mySecret.
Afterwards, it is recommended to run yum commands to check for and perform
updates.
$ sudo [vi|vim] /etc/yum.repos.d/ta.repo

[Trusted Analytics repo]
name=Trusted Analytics yum repo
baseurl=https://s3-us-west-2.amazonaws.com/trustedanalytics-repo/release/latest/yum/dists/rhel/6
gpgcheck=0
priority=1
#enabled=0
s3_enabled=0
key_id=myKey
secret_key=mySecret
To check for new updates and see the difference between the new and installed version:
$ sudo yum info trustedanalytics-rest-server
To update:
$ sudo yum update trustedanalytics-rest-server
Common VM problems
- The VM doesn’t have enough memory allocated.
- The TA REST server wasn’t restarted after restart or boot.
