Entity management
Entities are the main content of the site. Each entity consists of a name, an associated domain, and the XML that describe its metadata. The name is a non empty string that cannot contain the following characters: !, \, :, & or |. The metadata must be valid XML conforming to the set of validators that are configured in this site.
In the home page of the site there is a link at the bottom, labelled Full list of entities, that takes the user to a paginated list of all entities, regardless of their owners. In this page the user can add a new entity, if she follows the link labelled Add entity. In the form presented thereafter she will only have to provide a name for the new entity and select a domain from the set of domains she owns. The user can also adds an enttiy from her profile page since there is another Add entity link there. From the list of entities a user can also click on an entity to view its details. If she she is visiting the site as an authenticated user, in this entity detail page she will be presented with a menu that allows her to manage the entity. This menu presents the following links:
- Details: The detail page for the entity, the same that is accessed by clicking on its name from the listing of all entities. This is considered the main view of an entity.
- Modify: Change name. This link takes the user to a form to change the PEER name for the entity.
- Edit metadata: This link takes the user to a view that allows her to edit the metadata for the entity. There are 3 ways of editing these metadata, as we shall see bellow in the section Metadata edition.
- Remove: This link is used to completely remove the entity from the database. Clicking on it will take the user to a confirmation page, and the user confirms this action, the entity will be deleted permanently. A warning will be shown since this action can not be undone.
- Team permissions: This link takes the user to a view where he can create a team of people to manage the entity. She can also assign ownership of this entity to another user. Another warning is shown in that case since that action can not be undone neither.
- Metarefresh: This link is only displayed when an entity provides an Entity ID which is a valid URL. Clicking on this link will take the user to a page where she can select the frequency to check and update for changes in the URL of the entity ID. The frequency options are Never, Daily, Weekly and Monthly. By default the refresh frequency will be never. If there is any problem while refreshing an automatic email will be sent to the owner of the identity with the error message.
Metadata edition
The metadata of an entity consists of an XML document that should conforms to the SAML Metadata 2.0 standard . There are three ways to edit the metadata of an entity. All three of them are accessible from the Edit metadata page for the entity.
- By text editing: The user is presented with a text area with the XML document, where she can directly edit the XML. This basic text area is improved with the SAMLmetaJS plugin to display a tabbed editor in which the first tab represents the original textarea but the other tabs can be used to edit a specific part of the XML with a more user friendly dedicated editor.
- By uploading a file: The user is presented with a file input, through which she can upload a file with the new XML metadata document.
- By fetching a remote URL: If the metadata is published elsewhere in the network, the user can use this form to provide the URL of the published XML metadata document. The system will download the document pointed at by the URL and use it as metadata for the entity.
In the last two cases the user needs to agree with the Terms of Use text by activating the related checkbox.
When the submit button is clicked a commit dialog pops up with validation errors or, if everything went well, the differences between this version and the previous one. If the changes are fine a commit message must be filled before being able to submit the form. This text will be associated with the new revision, and used to identify it. If there are errors the error messages will be displayed in the main page after closing the commit dialog in order to make it easier to fix these problems.
All the inputs in these forms are required: leaving one of them empty will trigger a validation error, and the user will be prompted to fill in the missing value. Additionally, the system will check that the entered metadata (irrespective of the method used to enter it) is valid according tot the validators that are configured in this PEER site. If it isn’t valid, the metadata will not be saved and the user will be prompted to enter correct values, with indications, whenever possible, of the detected errors.
Details view
This is the main page of an entity and it display a lot of information about the entity.
First it shows the owner, the team and the domain that are associated with the entity.
Then it display some parts of the XML in a more usable way:
- Entity ID
- Endpoints
- Contact information
- Organization information
- Certificates
After that a Changes feed link is displayed with a RSS document containing the history of the entity.
Finally a Show history drop down button is displayed. If the user clicks on this link, a table with all the revisions made to this entity is shown. The user can see the contents of the XML for each particular revision by clicking on the Id cell. She can also see the differences between any revision (but the last) and the previous revision by clicking on the Diff cell.
Entities Feed
A feed listing the metadata of every entity is available at http://127.0.0.1:8000/entitiy/rss
It’s possible to filter entities by adding xpath expressions to the URL. Each xpath expression is preceeded with the xpath parameter name:
http://127.0.0.1:8000/entity/rss?xpath=query1&xpath=query2
The value of each xpath parameter is a xpath expression supported by ElementTree http://effbot.org/zone/element-xpath.htm
In addition to this API you can also match the text of any node of the metadata by adding a = and the text you are searching to the end of the xpath expression:
http://127.0.0.1:8000/entity/rss?xpath=query1=text1
This means that if a set of nodes matches the query1 xpath then the metadata will be a match if any of those nodes has text1 as its text contents.
When using multiple xpath parameters they are combined with the AND boolean operator.
Examples
Get all entities with a SingleLogout endpoint
http://127.0.0.1:8000/entity/rss?xpath=//md:SingleLogoutService
Get all entities from organization Acme:
http://127.0.0.1:8000/entity/rss?xpath=//md:OrganizationName=Acme
Get all entities in the category Research & Scholarship
http://127.0.0.1:8000/entity/rss?xpath=//Attribute[@Name='http://id.incommon.org/attribute/entity/category']/AttributeValue=http://id.incommon.org/category/research-and-scholarship
Entity Groups
Entity groups allow to group entities by metadata.
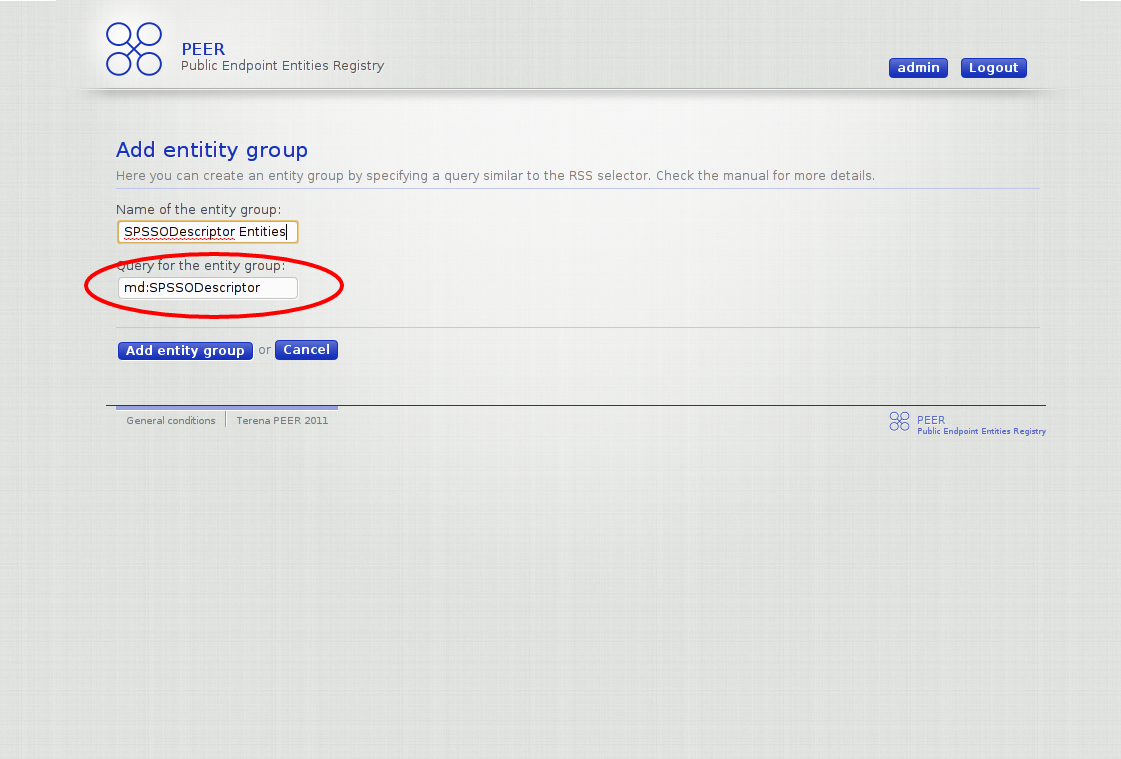
To create an entity group by metadata, the user has to navigate to her profile page. In the menu she would click on Add entity group. This link will take the user to a form where she has to type the name of the group and the query to select the group. The query syntax is exactly the same as specified in Entities Feed. Here it’s shown the query for all entities which have the tag md:SPSSODescriptor:
Every entity group created by the user will be listed in the profile view under Your entity groups. From there the entity group can be deleted or edited. Clicking on the link with the name of the group will take the user to the main view of entity group, where all the entities in the group will be displayed as well as providing a link to the correspondent feed for the entity group.