glitter Example: OpenCL
Summary
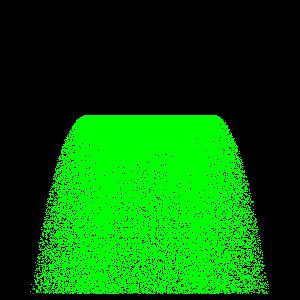
This program will open a GLUT window and render an animated particle simulation. The particle simulation is computed in OpenCL, and the results are written directly to an OpenGL array buffer.
Front matter
Module docstring
The module docstring is used as a description of this example in the generated documentation:
"""Basic OpenGL/OpenCL interoperability example.

@author: Stephan Wenger
@date: 2012-02-29
"""
Imports
We use numpy for creating the particle data:
import numpy
PyOpenCL (documentation, PyPi, download) is a convenient Python wrapper for OpenCL:
import pyopencl as cl
For creating an OpenCL context that shares data with OpenGL, we need
get_gl_sharing_context_properties:
from pyopencl.tools import get_gl_sharing_context_properties
We can usually import classes and functions contained in glitter submodules directly from glitter:
from glitter import ArrayBuffer, VertexArray, get_default_program
Modules with external dependencies other than numpy, such as platform dependent parts like methods for the generation of an OpenGL context, however, have to be imported from their respective submodules:
from glitter.contexts.glut import GlutWindow, main_loop
OpenCL
OpenCL kernel
The OpenCL kernel (adapted from a CMSoft tutorial) computes a single iteration of a simple Eulerian particle simulation. Kernel code can be loaded from a file or defined inline as a Python string:
kernel_code = """
__kernel void animate(__global float4* positions,
                      __global float4* colors,
                      __global float4* velocities,
                      __global float4* initial_positions,
                      __global float4* initial_velocities,
                      float dt) {
    unsigned int i = get_global_id(0);
    float4 p = positions[i];
    float4 v = velocities[i];
    float life = velocities[i].w;

    life -= dt;
    if (life <= 0.0) {
        p = initial_positions[i];
        v = initial_velocities[i];
        life = 1.0;
    }

    v.z -= 9.8 * dt;
    p.xyz += v.xyz * dt;
    v.w = life;

    positions[i] = p;
    velocities[i] = v;
    colors[i].w = life;
}
"""
OpenCL interaction
The CLCode class will comprise all OpenCL interaction:
class CLCode(object):
Initialization
The constructor receives OpenGL buffers for positions and colors as well as a numpy array of velocities and a timestep for the simulation: def __init__(self, gl_positions, gl_colors, velocities, dt=0.001):
First, we have to initialize the OpenCL context. That means we have to get a list of available platforms and select one:
platform = cl.get_platforms()[0]
Then, we can create a context. Passing
get_gl_sharing_context_properties() as a property
ensures that we share state with the active OpenGL context:
        self.ctx = cl.Context(properties=[(cl.context_properties.PLATFORM, platform)] +
                get_gl_sharing_context_properties(), devices=None)
A command queue is necessary for serializing OpenCL commands:
self.queue = cl.CommandQueue(self.ctx)
Finally, we can compile the kernel:
self.program = cl.Program(self.ctx, kernel_code).build()
The constructor parameters are stored for later use:
        self.gl_positions = gl_positions
        self.gl_colors = gl_colors
        self.velocities = velocities
The dt value will later be passed to an OpenCL kernel as
a 32-bit float. We therefore wrap it in a numpy float32
object:
self.dt = numpy.float32(dt)
Next, we generate OpenCL buffers. The positions and colors are
contained in OpenGL buffers, which we wrap in PyOpenCL's
GLBuffer<(/code> class:
        self.cl_positions = cl.GLBuffer(self.ctx, cl.mem_flags.READ_WRITE, self.gl_positions._id)
        self.cl_colors = cl.GLBuffer(self.ctx, cl.mem_flags.READ_WRITE, self.gl_colors._id)
Note how we had to extract the _ids from the
ArrayBuffer objects. In pure glitter code, you
should never (have to) access this value; however for interaction
with other OpenGL-related libraries, this cannot always be avoided.
The velocities are given as a numpy array, which is simply uploaded
into a new OpenCL Buffer object along with the initial
values of the positions and colors:
        self.cl_velocities = cl.Buffer(self.ctx, cl.mem_flags.READ_ONLY |
                cl.mem_flags.COPY_HOST_PTR, hostbuf=velocities)
        self.cl_initial_positions = cl.Buffer(self.ctx, cl.mem_flags.READ_ONLY |
                cl.mem_flags.COPY_HOST_PTR, hostbuf=self.gl_positions.data)
        self.cl_initial_velocities = cl.Buffer(self.ctx, cl.mem_flags.READ_ONLY |
                cl.mem_flags.COPY_HOST_PTR, hostbuf=self.velocities)
Execution
Theexecute function executes the OpenCL kernel several
times in a row:
def execute(self, sub_intervals):
First, we have to make sure that OpenGL is done using the buffer objects:
cl.enqueue_acquire_gl_objects(self.queue, [self.cl_positions, self.cl_colors])
Now, we can safely call the kernel. Its arguments are buffer objects:
        args = (self.cl_positions, self.cl_colors, self.cl_velocities,
                self.cl_initial_positions, self.cl_initial_velocities, self.dt)
The kernel will be executed several times with a small step size. This increases the accuracy with respect to a single step with a large step size. However, it is not necessary to display all the intermediate results.
for i in xrange(0, sub_intervals):
In each step, the animate kernel function is called.
Its arguments are the queue object that schedules its execution,
the global and local block sizes, and any arguments that will be
passed to the actual kernel.
self.program.animate(self.queue, [len(self.gl_positions)], None, *args)
Finally, we allow OpenGL to access the buffers again:
cl.enqueue_release_gl_objects(self.queue, [self.cl_positions, self.cl_colors])
Main class
We wrap all the OpenGL interaction in a class. The class will contain an
__init__() method to set up all OpenGL objects, any required
callback methods, as well as a run() method to trigger execution
of the GLUT main loop.
class OpenCLExample(object):
Initialization
When a OpenCLExample instance is created, we need to
initialize a few OpenGL objects.
def __init__(self):
First, we create a window; this also creates an OpenGL context.
self.window = GlutWindow(double=True, alpha=True, depth=True)
Then, we set the GLUT display and keyboard callback functions which will be defined later.
        self.window.display_callback = self.display
        self.window.keyboard_callback = self.keyboard
Here, we generate numpy arrays to hold the positions, colors, and velocities of the particles:
        num = 200000
        positions = numpy.empty((num, 4), dtype=numpy.float32)
        colors = numpy.empty((num, 4), dtype=numpy.float32)
        velocities = numpy.empty((num, 4), dtype=numpy.float32)
So far, the array contents are undefined. We have to initialize them with meaningful values:
        positions[:, 0] = numpy.sin(numpy.arange(0, num) * 2 * numpy.pi / num) * (numpy.random.random_sample((num,)) / 3 + 0.2)
        positions[:, 1] = numpy.cos(numpy.arange(0, num) * 2 * numpy.pi / num) * (numpy.random.random_sample((num,)) / 3 + 0.2)
        positions[:, 2:] = 0, 1
        colors[:] = 0, 1, 0, 1
        velocities[:, :2] = 2 * positions[:, :2]
        velocities[:, 2] = 3
        velocities[:, 3] = numpy.random.random_sample((num,))
Instead of simply generating a vertex array from the position and color data, we first generate array buffers for them:
        gl_positions = ArrayBuffer(data=positions, usage="DYNAMIC_DRAW")
        gl_colors = ArrayBuffer(data=colors, usage="DYNAMIC_DRAW")
These array buffers will later also be used by OpenCL. We do not need to
wrap velocities in this way, as it will only be used by
OpenCL and can be wrapped in an OpenCL buffer directly.
We now create a vertex array that will pass the position and color data
to the shader. The vertex array constructor accepts
ArrayBuffer instances:
self.vao = VertexArray(gl_positions, gl_colors)
In the OpenGL core profile, there is no such thing as a "standard pipeline"
any more. We use the minimalistic defaultpipeline from the
glitter.convenience module to create a shader program instead:
self.shader = get_default_program()
Here, we create the CLCode object that manages OpenCL
interaction. It is passed the OpenGL buffer objects as well as a numpy
array of velocities.
self.clcode = CLCode(gl_positions, gl_colors, velocities)
Callback functions
Display function
Here we define the display function. It will be called by GLUT whenever the screen has to be redrawn.
def display(self):
First we clear the default framebuffer:
self.window.clear()
To draw the vertex array, we use:
self.vao.draw()
After all rendering commands have been issued, we swap the back buffer to the front, making the rendered image visible all at once:
self.window.swap_buffers()
Timer function
The animation is controlled by a GLUT timer. The timer callback animates the particle system, schedules the next timer event, and causes a screen redraw:
def timer(self):
We first tell an instance of the CLCode class to execute the
OpenCL kernel:
self.clcode.execute(10)
The following line schedules the next timer event to execute after one millisecond.
self.window.add_timer(1, self.timer)
Finally, we tell GLUT to redraw the screen.
self.window.post_redisplay()
Keyboard function
To further illustrate the concept of GLUT callbacks, here's a keyboard handler that will simply make the program exit when any key is pressed:
    def keyboard(self, key, x, y):
        raise SystemExit
Running
We will call the run() method later to run the OpenGL code.
def run(self):
To start the animation, we call the timer once; all subsequent timer calls will be scheduled by the timer function itself.
self.timer()
The default program is bound by using a with statement. At
the same time, we can pass in additional uniform variables, such as the
modelview matrix:
with self.shader(modelview_matrix=((1, 0, 0, 0), (0, 0, 1, 0), (0, 1, 0, 0), (0, 0, 0, 2))):
With the shader bound, we enter the GLUT main loop.
main_loop()
When the main loop exits, control is handed back to the script,
unless SystemExit has been raised by the keyboard
handler.
Main section
Finally, if this program is being run from the command line, we instanciate the main class and run it.
if __name__ == "__main__":
    OpenCLExample().run()