Basic View (with Login/Logout)
We have now completed our project setup, the next step is to actually use JQuery Mobile to create some views. The jqm project simply provides a number of templates that can be used to quickly get your jqm site up and running with the content-distribution-network hosted jqm sources. These templates are fairly basic in their design, they use the default jqm styles to produce a generic layout.
We’ll set up the DB so that Django will start up:
$ DJANGO_SETTINGS_MODULE=tutorial.settings django-admin.py syncdb
$ DJANGO_SETTINGS_MODULE=tutorial.settings django-admin.py runserver 0:8080
URL Configuration and Login/Logout Support
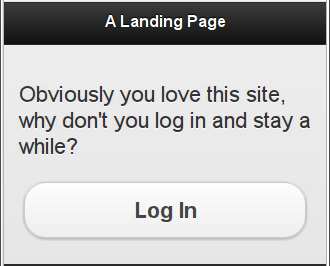
Our first view will be a fairly generic landing page with a bit of text and a “call to arms” in the form of a button to view a login-protected page (since we only have a single page at the moment, this will currently be our front-page as well). Since we need the page to show up as the root page, we’ll add a reference to the project urls.py. We’ll also enable a login and logout page with a url mapping:
from django.conf.urls.defaults import patterns, include, url
urlpatterns = patterns('',
    # Examples:
    url(r'^/?$', 'tutorial.views.home', name='home'),

    url(
        r'^accounts/login/$','django.contrib.auth.views.login',
        dict(
            template_name = 'jqm/login.html',
        ),
        name='login',
    ),
    url(
        r'^accounts/logout/$','django.contrib.auth.views.logout',
        dict(
            template_name = 'jqm/logout.html',
        ),
        name='logout',
    ),

)
Pay particular attention to the names used, the django-jqm templates use named url references for generating login/logout buttons and the like. The actual views used are the built-in login/logout views from the django auth framework.
A Generic View (for Now)
And then we will add the home view to our views module (we could, instead, use a generic view here, but you are likely going to want to customize this view later):
from django.shortcuts import render_to_response
from django.template import RequestContext as RC

def home( request ):
    return render_to_response(
        'index.html',
        {},
        context_instance = RC( request, {} ),
    )
A JQM-derived Template
And create the templates folder for our project templates:
$ mkdir tutorial/templates
our view is currently just rendering the template index.html which extends the jqm/simple.html base template:
{% extends "jqm/simple.html" %}
{% block title %}A Landing Page{% endblock %}
{% block content %}
{% if user.is_anonymous %}
    <p>Obviously you love this site, why don't you log in and stay a while?</p>
    <a data-role="button" href="{% url login %}">Log In</a>
{% else %}
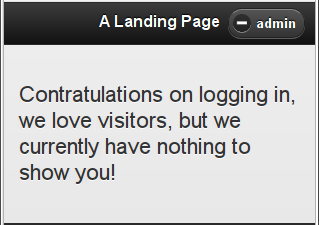
    <p>Contratulations on logging in, we love visitors, but we currently have nothing to show you!</p>
{% endif %}
{% endblock %}
The Results
At this point, we can run our development server:
$ DJANGO_SETTINGS_MODULE=tutorial.settings django-admin.py runserver 0:8080
and check out the web-site at:
http://localhost:8080/
where we can see this (approximately):


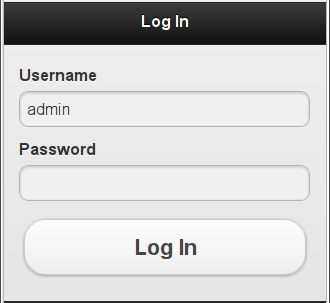
You will note that the page transition from the call to arms page and the initial login page is a “slide” animation (the default for JQuery Mobile), while the transition on submitting from the login page is a regular web-page reload. This is because the login page, as with most form-handling pages, uses a redirct-on-success operation. JQuery Mobile currently does not have a way to handle a redirected form properly, so our login template tells the login form to use regular page-loading rather than a JQuery Mobile brokered AJAX submission of the form content.
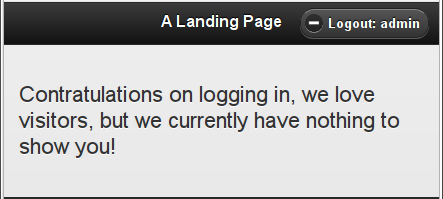
You will also note that the logout button shows/hides the “Logout:” text as the window is wider/narrower. This is done with a CSS Media Query. You will need to understand those to be able to customize your mobile web-apps.
You may want to continue on to An (HTML5) Form View.