PyStretch Usage By Example
Introduction
It is envisioned that the vast majority of users will wish to utilize PyStretch via a single interface; pystretcher.py. This script allows access to the functionality of PyStretch without having to write any additional code.
The simplest way to highlight both the syntax of pystretcher.py and provide an example of the output you could expect with your data is through a series of example images and the code called to create them. All of the sample images were generated using pystretch_test.py and the usage of that script will be described first.
Note
‘1’ is prepended to the original, cropped image to ensure that it remains at the top of the testimages directory.
PyStretch Test
While unittest testing is in development, this script has been included to provide a tool by which users can test the implementation of the stretching and analysis algorithms on a subset of their data. This script takes the coordinates (pixel or projected) of a specified input image, iterates over every available stretch and filter in PyStretch, and generates an output thumbnail.
To generate a series of thumbnails when you know the pixel location of an interesting feature you want to test the package on use:
$ pystretch_test.py -srcwin origin_x origin_y width height your_input_image.tif
for example:
$ pystretch_test.py -srcwin 0 0 500 500 some_cool_image.tif
This will generate a directory called ‘testimages’ with the original image called ‘1original_cropped_image.tif’.
To generate a series of thumbnails when you know the projected coordinates of an interesting feature you want to test the package on use:
$ pystretch_test.py -projwin ulx uly lrx lry input_image.img
for example:
$ pystretch_test.py -projwin -1.25 -26.5 .25 -25.0 some_cool_image.img
Note
On a dual core MacBookPro this test, when generating 500 x 500 pixel thumbnails requires under 10 seconds. (8-bit input)
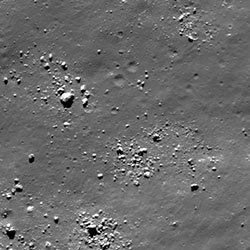
Sample Output
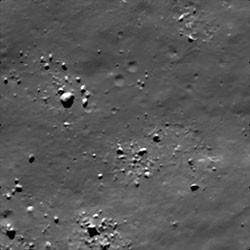
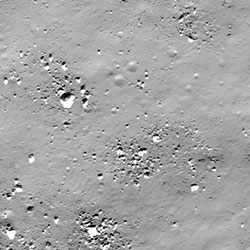
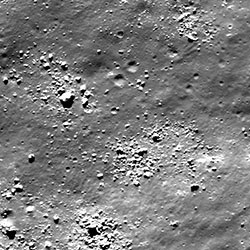
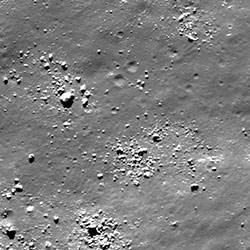
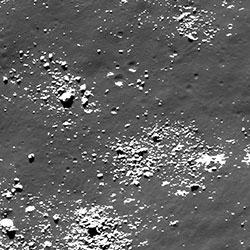
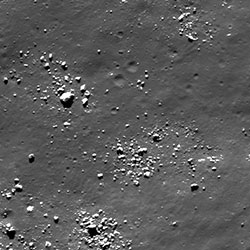
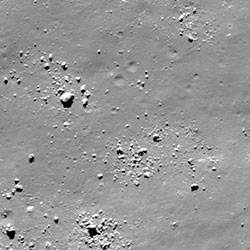
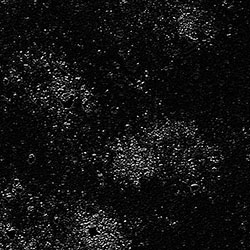
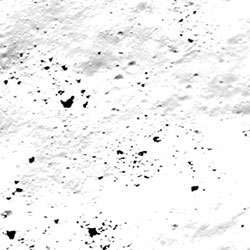
Below is the output from a run of pystretch_test.py on a LROC NAC Image of the Earth’s Moon. The original image is a 1GB Geotiff over 65,000 pixels long and 5,000 pixels wide. This test was performed using:
$ pystretch_test.py -srcwin 775 58,225 500 500 LROC_NAC_Test_Image.tif
Original Cropped Image

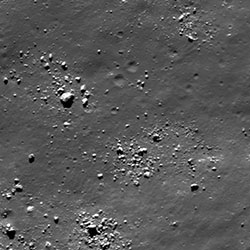
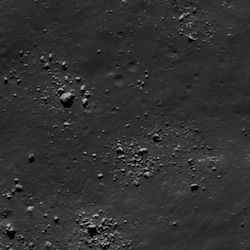
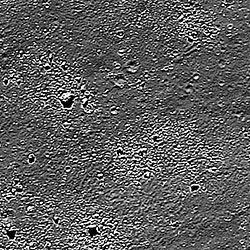
Linear Stretches
Linear contrast stretches remap input pixel values using linear algorithms: y= mx+b or some variation of y = mx+b.
Linear Contrast Stretch
- The linear contrast stretch remaps pixel values from [IMin , IMax] to [JNewMin , JNewMax ], where:
- I is the input image with a range of values from min to max and J is the output image with a newly calculated range. This new range is based on the data format’s minimum and maximum values. The new minimum and maximum can be modified by a percentage clip, which clips the tails of the output histogram.
Stretch to min /max:
$ pystretcher.py -l <some_input>

With a 2% clip:
$ pystretcher.py --linear --clip 2 <some_input>
With a 30% clip:
$ pystretcher.py --linear --clip 30
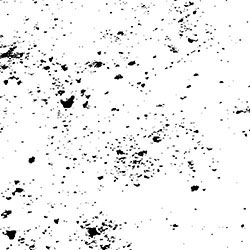
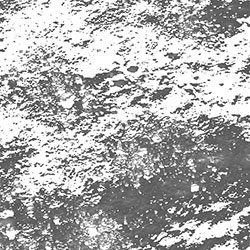
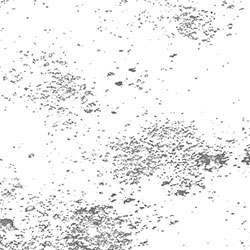
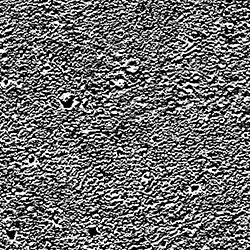
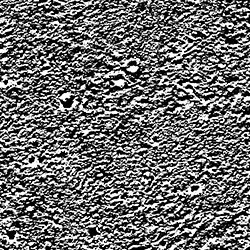
Binary Contrast Stretch
A binary contrast stretch takes an input pivot value and maps all pixels greater than or equal to that value to the format mac and all pixels less than that value to the band min. This can be expressed as:
Px,y< Pivot = Format_Minimum,
Px,y>= Pivot = Format_Maximum
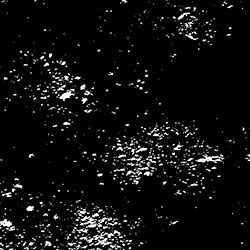
In this usage case, the stretch does a passable job at identifying boulder shadows and sunlit boulder faces.
Pivot Value 64:
$ pystretcher.py --binary --threshold 64 <some_input>
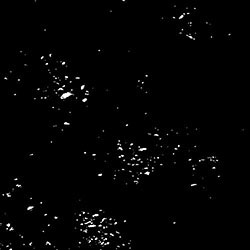
Pivot Value 128:
$ pystretcher.py -y --th 128 <some_input>
Pivot Value 192:
$ pystretcher.py --binary --th192 <some_input>
Inverse Contrast Stretch
An inverse contrast stretch remaps the input histogram to its inverse using:
Pout = absolute_value( Px,y- inputmaximum)
Usage:
$ pystretcher.py -i <some_input>
or:
$pystretcher.py --inverse <some_input>
Standard Deviation Stretch
A standard deviation stretch acts much the same as a linear stretch. The input pixel values are remapped to within a user defined number of standard deviations (Sigma or n) of the input images mean value.
Sigma = 0.5:
$pystretcher.py -d -n0.5 <some_input>
Sigma = 1:
$pystretcher.py --std --standarddeviations 1 <some_input>
Sigma = 2:
$pystretcher.py -d -n 2 <some_input>

Sigma = 3:
$pystretcher.py --std -n 3 <some_input>
High Cut Stretch
The high cut stretch maps all values greater than the provided threshold to a user defined cut value. The default cut value, if you do not wish to supply one is 0.
This can be expressed as:
- if Pout > threshold:
- Pout = CutValue
- else:
- Pout = Pin
where, P is the pixel value at some x,y, coordinates
Threshold 64:
$pystretcher.py --hicut --th 64 --cutvalue=0 <some_input>

Threshold 112:
$pystretcher.py --hicut --th 112 --cutvalue=0 <some_input>
Threshold 160:
$pystretcher.py --hicut --th 160 <some_input>
Threshold 232:
$pystretcher.py --hicut --th 232 <some_input>

Low Cut Stretch
The low cut stretch maps all values less than the provided threshold to a user defined cut value. The default cut value, if you do not wish to supply one is 0.
This can be expressed as:
- if Pout < threshold:
- Pout = CutValue
- else:
- Pout = Pin
where, P is the pixel value at some x,y, coordinates
This stretch is wonderful when noise is constrained to high or low (pixel value) portions of an image and you wish to selectively remove it ro improve analysis of some feature.
Threshold 64:
$pystretcher.py --lowcut --th 64 --cutvalue=0 <some_input>

Threshold 88:
$pystretcher.py --lowcut --th 88 --cutvalue=0 <some_input>
Threshold 112:
$pystretcher.py --lowcut --th 112 --cutvalue=0 <some_input>
Non - Linear Stretches
Linear contrast stretches remap input pixel values in a non-linear fashion. That is pixels are mapped using some function other than y=mx+b or a derivative of y=mx+b.
Gamma Stretch
A gamma stretch remaps pixels using the equation:
POut= Px,y^gamma
This stretch is often used to lighten or darken an entire image when features are either under or over exposed.
Gamma = 0.8:
$ pystretcher.py --gamma --gammavalue 0.8 <some_input>

Gamma = 1.2:
$ pstretcher.py -g --gv1.2 <some_input>
Gamma = 1.6:
$ pstretcher.py --gamma --gv1.6 <some_input>
Gamma = 2.0:
$ pstretcher.py -g --gv2 <some_input>
Gamma = 2.4:
$ pstretcher.py -g --gv2.4 <some_input>
Histogram Equalization
Histogram equalization attempts to populate a user defined number of bins with an equal number of pixel values, distributed across the entire histogram. When visualizing the output histogram, do no expect to see a flat histogram, instead you should see a linear cumulative distribution function.
Histogram equalization is both processor and RAM intensive. This algorithm has not been optimized other than the inherent optimization that the scipy team has performed in the binning of data and the interpolation of arrays.
Equalization with 64 bins:
$pystretcher.py -q -b64 <some_input>
Equalization with 128 bins (the default):
$pystretcher.py --histogramequalization --bins 128 <some_input>

Equalization with 192 bins:
$pystretcher.py -q -b192 <some_input>

Logarithmic Stretch
We have implemented a test logarithmic stretch (useful primarily for radar data) which has not undergone sufficient testing. Please provide feedback if you use this stretch via our github page or by contacting the author directly.
The logarithmic stretch can be invoked using:
$ pystretcher.py --log --epsilon <float>
The currently implemented algorithm is:
scaling_factor = 255/(log10(1+abs(PMax)))
POut= scaling_factor * log10(epsilon + abs(Px,y)
Filters
Filters alter the input image by correlating or convolving the input pixel using some kernel which specifies a neighborhood weighting by which the central pixel is to be modified. Traditionally, these processing have been extremely processor intensive as each value in an input array must be iterated over and modified. We have seen the largest speed gains using filters in a multiprocessing environment.
Laplacian Filter
A laplacian filter is an edge detection filter.
Laplacian Filter with 3x3 kernel:
$ pystretcher.py --lap -k 3 <some_input>

Laplacian Filter with 5x5 kernel:
$ pystretcher.py --laplacial --kernel 5 <some_input>
High Pass Filter (3x3 Kernel)
High pass filters serve to sharpen an input image, primarily by brightening the input pixel to the surrounding pixels. This is accomplished by weighting the input pixel, negatively weighting the neighborhood, and convolving the kernel to the array. PyStretch hard codes the high pass kernel.
High Pass Filter with 3x3 kernel:
$ pystretcher.py --hi3 <some_input>
High Pass Filter (5x5 Kernel)
High pass filters serve to sharpen an input image, primarily by brightening the input pixel to the surrounding pixels. This is accomplished by weighting the input pixel, negatively weighting the neighborhood, and convolving the kernel to the array. PyStretch hard codes the high pass kernel.
High Pass Filter with 5x5 kernel:
$ pystretcher.py --hi5 <some_input>
Gaussian Filter
A gaussian filter is a blurring filter.
Gaussian Filter with 3x3 kernel:
$ pystretcher.py --gf --kernelsize 3 <some_input>

gaussian Filter with 5x5 kernel:
$ pystretcher.py --gaussianfilter -k 5 <ome_input>

Gaussian High Pass Filter
A gaussian highpass filter is an example of an edge detection filter.
Gaussian Filter with 3x3 kernel:
$ pystretcher.py --gh --kernelsize 3 <some_input>
gaussian Filter with 5x5 kernel:
$ pystretcher.py --gaussianhipass -k 5 <ome_input>
Mean Filter
A mean filter takes the average value of the neighborhood and applies it to the input pixel.
Mean Filter with 3x3 kernel:
$ pystretcher.py --mf --kernelsize 3 <some_input>
Mean Filter with 5x5 kernel:
$ pystretcher.py --mean -k 5 <ome_input>

Conservative Filter
The conservative filter checks to see if the input pixel is an outlier to the neighborhood (greater than or less than a neighbor). If it is, the pixel value is remapped to the nearest value within the neighborhood. This is a good filter to test on salt and pepper noise while trying to retain detail.
Conservative Filter with 3x3 kernel:
$ pystretcher.py --cf --kernelsize 3 <some_input>

Conservative Filter with 5x5 kernel:
$ pystretcher.py --conservativefilter -k 5 <some_input>

Median Filter
The median filter takes the median value from the neighborhood and assigns it to the input pixel.
Median Filter with 3x3 kernel:
$ pystretcher.py --md --kernelsize 3 <some_input>

Median Filter with 5x5 kernel:
$ pystretcher.py --median -k 5 <ome_input>